Sunday, January 26, 2014

Tippi Hedren Suit Done! - Butterick 2178

I finished the Tippi Hedren inspired suit Saturday night, just in time for our Italy trip reunion on Sunday - we got together and shared photos and memories.  I usually don't like to sew with a deadline, but I really wanted to finish my suit so our fellow travelers could see that I actually did something with the fabric that I forced them to admire as we left Rome.  Here it is:


Here I am doing my best Tippi Hedren impersonation:


OK, I'm not quite the tall, willowly blond Tippi Hedren was. 


But I am enormously pleased with this suit.  As you can see, my winged collar isn't exactly like Ms. Hedren's, but I think I captured the essence.  As you recall, I began with this pattern:


The Butterick pattern was published in 1963, and had fake pocket flaps, rather than patch pockets, and the jacket had no cuffs.  The film was released in 1963, which means it was probably filmed in 1962.  I recently trolled the internet for 1962 patterns and saw that the suits in 1962 did have the patch pockets and collars more like Ms. Hedren's.  


As you recall, I used McCalls 5972 (the blue dress version) for my dress under the jacket.  It is just a basic, sleeveless sheath dress.  I lined the bodice with some leftover quilting weight cotton I had in my scraps stash.  I did not line the skirt portion.  It was interesting that Edith Head's original conception of the costume was a skirt and blouse under the jacket, just like my pattern.  Somewhere along the way, she must have decided to do a dress instead.


When I lift my arms, the peach colored lining peeks out.  That's OK with me:


Here's the back:

Whoops, I probably needed a little more pressing back there.  The Carpenter didn't get a photo of the bottom of my dress - it's straight, with a back vent.  Because the jacket is boxy, you need a straight skirt.  A full skirt with a boxy jacket is not the most chic look.

This suit was a joy to sew, and my favorite thing I have ever made.  I have high hopes that it will equally be a joy to wear - I certainly enjoyed wearing it this afternoon.  While I usually don't like having self-imposed deadlines, I'm glad I did for this suit because it really is a cooler weather suit.  There's nothing more deflating than working on a garment and then putting it away for six months before you can properly wear it.

All my posts on this project are here.

I anticipate wearing this jacket a lot, with jeans, if nothing else.  I want to make another dress or a skirt to coordinate with the jacket.  I'm thinking of this checked fabric:


(I believe it is some sort of rayon/silk blend.)  I have until February 12th to wear my new suit to the Hollywood Exhibit at the VMFA and compare it to the original inspiration!

Monday, January 20, 2014

It's A Sewing Room Miracle! And the Tippi Hedren Suit Progress - Butterick 2178

On Saturday, Vicki came over and helped me figure out how to organize my sewing room.  She saw it over Christmas - in the same state as the day I moved in a year and a half ago - and she became deeply depressed.  The room was full of boxes and bags of crap, I mean, my stuff, and she felt a great disturbance in The Force - the Sewing Force, that is.  Something Had To Be Done.

My problem was that I was paralyzed by choice.  In the past, I sewed where ever I had a flat surface - give me no room and no choice and I can make it happen, but give me a blank canvas and I'm stuck.  A dedicated sewing room seriously messed with my head.

So Vicki loaded up all her organizing skills and unleashed them at my house.  And at my husband.  The Carpenter now has homework, and he knows it.  He's going to hang a peg board for me, elevate an old table, and create a shelf on top of two bookcases we bought on Saturday.  As soon as he does all that, I'll take photos and post them so you can behold the awesomeness that is my new sewing room.

On Sunday, I entered the sewing room and sewed for 12 hours.  I finally stopped about 11:00 pm but only because The Carpenter said, "Time for bed."  Basically, I finished the jacket of the Tippi Hedren suit!  On Sunday morning it was exactly where you saw it last with only the outer jacket constructed, and by 11:00 pm that night it was complete with only the lining hem to hand sew.  I credit Vicki and the new sewing room configuration.

So here it is:


You can see that I went with a peach colored silk charmeuse for the lining.  I dithered long and hard on this lining.  I considered using the lining I bought for the Gertie coat and the yellow skirt (God knows I have enough of it), but I was concerned it might be a little too warm.  I considered washed silk shantung, but I felt it would be too thin.  The charmeuse is lovely, and I had it in my stash, so I went with it.  

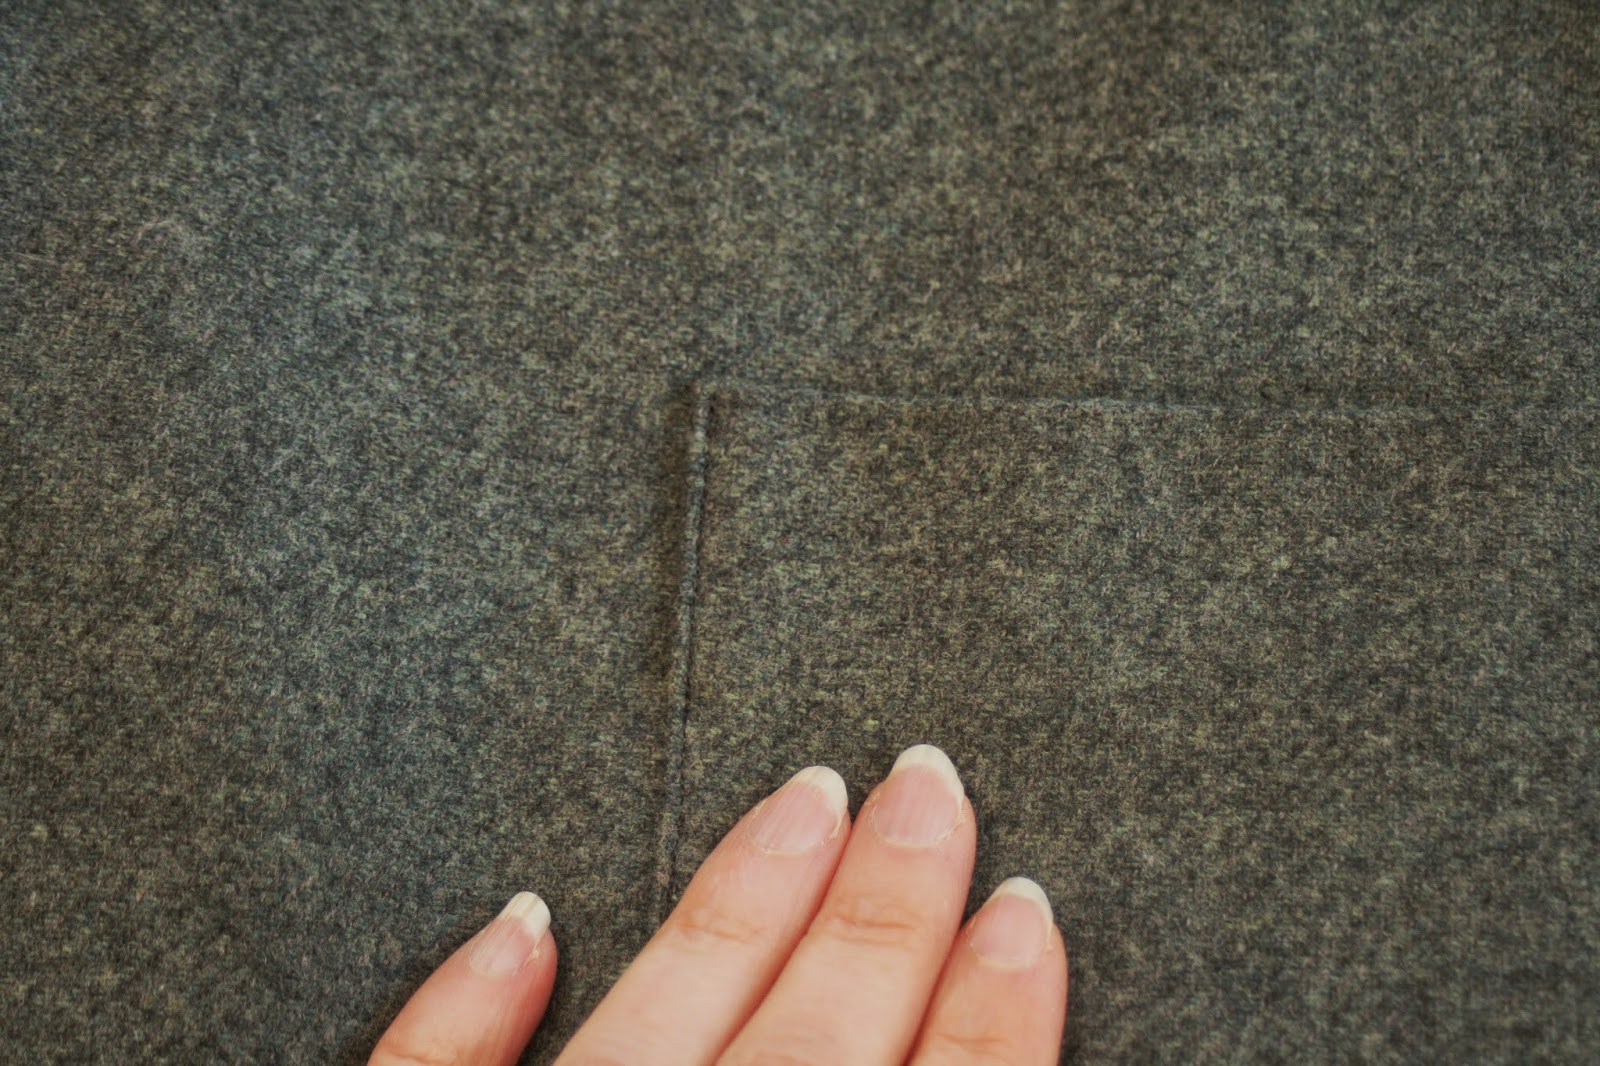
I re-did the pockets and I am much happier with them now:


This wool is very forgiving, and left no stitching marks behind, so it was easy to take them off, and re-orient the seam allowance inside the pocket.  It is much flatter now.

I am very proud of the cuffs, especially since I had to figure them out myself - my pattern had no cuffs:


 Here's how I did it:  I measured the width of my sleeve pattern at the bottom edge (14 1/4 inches).  That measurement became the width of my cuff pattern piece.  I knew I wanted my cuffs to be an inch and half wide, so I doubled that number (to three inches) and then I added my seam allowances (2 half inch seam allowances equals 1 inch), for a total of 4 inches.  So my cuff pattern was 14 1/4 inches by 4 inches.  I cut my cuffs from the pattern on the bias.

 I sewed the short 4 inch sides right side together and then turned the cuff right side out.  I folded the cuff in half length-wise, and sewed the two raw edges of the cuff to the inside of the sleeve.  Then I pressed the cuff to the outside of the sleeve.  By doing it this way, the seam joining the cuff to the sleeve is outside the jacket, rather than inside, but it will be covered by the cuff:


 The inside of the sleeve cuff looks clean and neat:


To keep the cuff turned up, I hand tacked it at the back seam of the sleeve and cuff.  (Doing it this way also automatically hems your sleeve lining as well!)

One thing I love about the sleeves on this jacket is the dart at the elbow, something you don't see in a lot of modern patterns:


So the lining.  I drafted my own lining pattern.  I don't know if I did it "right".  I did what made sense to me.  Here we go:

For the sleeves, I just used the sleeve pattern pieces with no change.  For the back lining, I used the back pattern piece, but instead of cutting the pattern piece on the fold, I positioned the pattern piece a half inch from the fold of the fabric: 


The extra half inch became my one inch pleat that gave me extra ease in my lining:


The original pattern fold line became my stitching line.  For the first two inches (from the top neckline), I used my regular sewing stitch.  After the first two inches, I went to a basting stitch until I reach 2 inches from the bottom edge, whereupon I went back to my regular stitch length.  After inserting the lining, I took out the basting stitches, thus releasing my pleat.

The front lining pattern piece was the most challenging.  I took the collar/jacket facing pattern piece,


and laid it over the front jacket pattern piece.  Then I traced whatever the collar/jacket facing pattern piece did not cover, but added an half inch where the facing and lining piece will meet when I stitch them together with a quarter inch seam allowance.  This is what I ended up with:


I know, not very exciting.  But it worked.  I didn't sew the darts in my lining pieces (with the exception of the sleeve dart), but I brought the legs together as tucks.  By not sewing the complete darts, I gave my lining extra ease.  

My one "duh" moment came when I prepared to hem the jacket, fully intending to put in a machine hem, when I realized that I would be hemming right through my pockets.  Doh!  A hand stitched hem was a must.  I have to admit that the interlining, again, helped tremendously, and allowed the hem to be truly invisible since I only stitched to the interlining, rather than all the way to the outer wool layer.  

I still have to hand sew the lining hem to the jacket hem.  Getting the lining lined up correctly is a challenge.  Too loose and it sags; too tight and it makes your garment hang funny.  And what looks right on the hanger doesn't necessarily look right on you.  So it is a lot of pinning and trying on.  I think I have it about right now:


I am enormously pleased with how this jacket has turned out.  With the incredibly soft wool/cashmere outer jacket and silk lining, this is an incredibly luxurious garment.  I have never worked with such gorgeous fabric.

Today I started on the dress that will go under the jacket.  As I have mentioned, I'm using McCalls 5972, and I cut it out today.  It won't be underlined, but I lined the bodice with cotton.  Again, this wool is so fantastic, I sort of don't want the sewing to end.  I might be able to make a vest from the scraps I have left, and don't think I won't try.  : )

I did finish the bodice today; here it is hanging from the back of my chair:


You can see one of the purchases Vicki and I made in the background!

Sunday, January 12, 2014

Tippi Hedren Suit - Outer Jacket Complete! Butterick 2178

I finished the outer jacket today and here it is:


The pockets are going to be a lot shallower than depicted in the photo because I haven't hemmed the jacket yet (the hem is a deep 1 3/4 inches).  To make the pockets, I started by looking at the front jacket pattern piece which shows the placement of the pocket flaps:


I measured, and the distances between the two dots above was 5 inches, so I added a half inch for two quarter inch seam allowances.  I then measured to the bottom edge of the pattern piece and that was 5 3/8 inches.  Then I added another two inches because I wanted a fold-over so that the lining of the pocket wouldn't show from the top of the pocket.  So my "pattern piece" for the pocket was 5 1/2 inches by 7 3/8 inches.  I didn't worry about being exact, since I could just trim the bottom of the pocket to be even with the bottom of the jacket.

I cut two pieces from the wool and two pieces from some silk scraps from some silk my in-laws brought me from Singapore.  I sewed them together at the top using a 1/4 inch seam allowance.  Then I stitched them together at the sides, right sides together, with the wool folded about an 1 1/4 inch down.  Then I turned the pockets right side out.  Here is a photo of the back/inside of the pockets:


And here's a close up of the front pocket before it was sewn on:

To attach the pocket, I used the placement dots on the pattern piece to orient me where I wanted the pockets.  I ended up putting them a half inch closer to the front and a half inch higher than the original pocket flap marks.

Then there was nothing left to do but topstitch down the side of each pocket.  I sweated this step though, because topstitching is forever.  (Not really, but it feels like it!)  I've been using the dark pine green thread I used on my Gertie coat for this project, but I felt that it was too dark for this heathered green wool.  I ended up using dark grey thread instead, which I believe blended better with the wool.

Also, I didn't topstitch the pockets all the way to the bottom edge of the jacket because I don't want the pocket edge to interfere with my hemming. So I left the bottom inch unstitched so I can trim the pockets before I hem.  The bottom of the pockets will be covered by the lining.

Of course, as I type, I realize that I should have pressed the wool/silk top seam towards the silk instead of towards the wool; it would lay flatter.  Thus, I'm not completely happy with the pockets, but I'm not certain I'm so unhappy that I would re-do them.  I'll ruminate on it for awhile.

Today I also made a pattern piece for the cuffs, and created a pattern piece for the jacket front lining.  Still don't know if it will work, but I'll make it work.  I laid out all the still uncut pattern pieces, along with the dress pattern pieces just to make sure I'll have enough fabric.  I'll have enough with about 1/4 yard to spare!

Saturday, January 11, 2014

Tippi Hedren Suit - A Major Shortcut!

So.  Cutting out.  Never anyone's favorite step in creating your dream garment.  I gave this step a lot of thought for two reasons:  1) I'm working with wool, which from my experience with the Gertie coat, I learned is difficult to mark because chalk is useless; and 2) this wool/cashmere blend is so soft it could slip through the proverbial ring.  The obvious solution was unpalatable: underline the jacket.  Underlining would provide body and structure to the wool, along with a great surface to make all my markings for darts, collar match points, etc.  BUT underlining traditionally involves hand sewing the underlining to your wool and then treating the two as one.  Ugh.

And then I got this idea.  This wonderful, awful idea.  Steam-A-Seam.  No, really.  I figured there would be three pieces that would need to be underlined:  the two fronts and the back.  (I won't underline the sleeves, and the facing/overcollar will be interfaced instead.)  I cut the fronts and back out of muslin and made all the markings I wanted.  Then I laid them down on the wrong side of my wool fabric:

 I pinned the muslin pieces to the wool about an inch and half from the muslin edges.  To apply the Steam-A-Seam, I lifted up the muslin cut edge and put a piece of Steam-A-Seam between the muslin and the wool, just at the edges of the muslin.  

The Steam-A-Seam, even unpressed, is slightly sticky and it kept the muslin and wool together sufficiently that I could go ahead and cut around the muslin pieces.  Then I picked up each piece (carefully), and place it on my ironing board, removed the pins, and pressed all the edges so the Steam-A-Seam adhered the muslin and wool together within the seam allowances.  

And voila!  My pattern pieces were underlined!  I realize that all over the world great past master tailors are rolling in their graves, but I don't care.  It was utterly awesome.  

I can't tell you how this simple idea has opened up my sewing possibilities - without having to handstitch underlining, I'll want to underline everything.  I already use Steam-A-Seam for putting in centered zippers (and I have secretly started using it for invisible zippers too, but I haven't perfected my technique yet), and now I'm wondering:  where else can I use this incredible stuff?

Once the garment pieces had cooled, I machine stitched down the center of my larger darts to keep the layers from shifting while sewing the darts.  Then I just proceeded to sew the jacket as usual.


 This wool is such a joy to work with.  It sews well, it presses beautifully.  I am getting spoiled by working with such a high quality fabric.  No wonder sewers become hooked on tailoring.  Here's a shot of the outside of the front of the jacket.  You can see the french dart:


I continued to look for a way to mark wool, though, and searched high and low for clay tailor's chalk, which will adhere better to wool than just regular chalk.  I finally found this from Wawak, 36 pieces for $ 8.45 in assorted colors.  


I knew I would need this for marking the sleeves, and for marking the dress pattern pieces which I will not be underlining. The pieces came packed in what looked like sawdust:


I used the yellow marker today on the sleeves which have a dart at the elbow, and it worked like a charm!  I can't recommend this product highly enough - I ordered it on Monday and it arrived on Tuesday!  So basically, I'm set for life on clay tailor's chalk.

Tomorrow I hope to finish getting those sleeves set in, cut out and sew the pockets, and figure out how to draft the front lining piece.  But it is coming along nicely.  : )

Sunday, January 5, 2014

Tippi Hedren Suit - Butterick 2178 & A Confession

I have to apologize; you know that deep freeze the eastern part of the US experienced this weekend?  The one that left everyone snowed in, stranded at the airport, and living in below zero temperatures? It's my fault.  Yep, I did it.  

I made a muslin this weekend.  Which caused the eastern US, and hell, to freeze over.  

I know, I should have seen it coming and warned all of humanity.  But I was too excited about proceeding with my Tippi Hedren suit based on her costume she wore in the film, "The Birds", which I got to see in person at the Hollywood Costume exhibit at the Virginia Museum of Fine Arts.

I've been obsessed with it for months.  Before I left on vacation, I bought Butterick 2178 on etsy.com because the jacket closely resembles Edith Head's creation:


 And then in Rome, I found this gorgeous wool/cashmere blend that I knew I would work beautifully:


 This shot shows the color more accurately:


It was 55 euros per meter and I bought three meters.  I goggled that and it works out to 3.28 yards of 60 inch fabric for $ 223.54.  By my calculations, the cost is $ 68.15 per yard.  That's actually not the most I've ever spent on fabric, but it is expensive enough to warrant a muslin.  

I wasn't so much concerned about the fit; the pattern is a 34 Bust which usually fits me fine, and this jacket isn't close fitting.  What I was more concerned about was understanding the instructions on how to put this thing together.  The collar is actually very similar to the Gertie coat, but the instructions are typical 1960s directions; that is, they are limited to one page for the jacket, the skirt, and the blouse:


That's it.  For the whole outfit.  (A far cry from Gertie's extensive sew-along!) Plus, the instructions called for sew-in interfacing which I have no intention of using and I want to make sure I understand the order of construction without it.

I made the muslin out of actual muslin fabric - I have a whole bolt of it.  No, I don't know why either, since I never make muslins.  I think I got it a Joann's and I must have suffered a seizure that day because  I have no other explanation as to why I have an entire bolt of white muslin fabric.

So here it is:


Not very exciting is it?  That's why I don't make muslins, because they aren't exciting.  But this one actually ended up being very valuable.  The instructions for this pattern are pretty blithe about the whole project; one section tells you how to pin the undercollar to the back of the jacket and then tells you to sew "in one operation" the front jacket darts and the undercollar to the back of the jacket.  I did not perform this step in "one operation", but in about six, carefully pinning and matching and sewing repeatedly.  The collar, like the Gertie coat, has a lot of "Y" seams, as quilters would call them.  They are tricky.

I ended up making one sleeve to check the length because the illustration on the envelope depicts the jacket sleeves ending just below the model's elbow.  Tippi's suit sleeves are longer than that, I want the longer length:


My muslin reveals that the sleeve length is actually longer than the pattern illustration shows and I am very happy with it.  Here's a photo which shows the suit in a little more detail, although I think the color is off; it is not this olive in real life:

 You can see that the collar isn't exactly like my pattern, but I like the pattern's collar better, so I'm going with it.  Also, you can see the sleeves have small one inch or 1.5 inch cuffs.  I like them, and I'll add them to my suit jacket.  

And Tippi's suit has patch pockets that go all the way to the hem of the jacket, which I've never seen before.  The pattern only has pocket flaps (but no pockets).  I like the patch pockets, so I'll add them as well to my version.

Finally, the pattern has no pattern pieces for a lining.  Tippi's costume was lined - I saw a photo of her running during the film, and the jacket was definitely lined, although it is a bit hard to tell because the designer Edith Head managed to find lining the exact same color as the suit.

My fabric is so beautiful and soft, it can slip through the proverbial ring.  Any jacket made with it deserves a lining.  So I'll have to draft a lining pattern, which I have never done before.  Based on my experience with the Gertie coat, I know I need to not use the back collar facing pattern piece and use the back pattern piece for my back lining, but add a one inch pleat in the back for ease.  I'm not completely certain how to make the front lining piece, but I'll review the pattern pieces of the Gertie coat to see how she did it.  I think I can figure it out.  

A couple of more facts about this costume; Edith Head is said to have designed it, but Edith Head's name was attached to a lot of films (especially Hitchcock's films), and there is no guarantee that she actually designed it.  It is possible that someone working on the costumes for the film did it.  Six of these suits were made for the film; necessary since there is the whole scene where Tippi Hedren is attacked by the birds and her suit is torn and bloodied.

I believe I will have enough fabric for a dress to go with the jacket.  The original costume has a sleeveless, high-necked dress with small gathers at the waist.  The skirt has a kick-pleat.  The photo above doesn't show it, but it was worn with a large belt with a square belt buckle.  My plan is make McCall's 5972 dress, a Laura Ashley pattern I've made before:


I'll make the blue version - the one without the collar.  I love the collar, but it shows under sweaters and jackets.  At this point, I'm going with this pattern because it only takes 1.25 yards of 60 inch fabric to make it, and my fabric has a twill weave which doesn't lend itself to gathering; I think a smooth waist is the way to go.

So that is it for now.  I started cutting out today, and I need to start drafting those pattern details I'm adding:  pockets, cuffs, and a lining!

Thursday, January 2, 2014

The Tale of the Yellow Skirt - McCalls 3341

Last winter Boden had a yellow wool skirt for sale; I really liked it, but the price, and the fact that I don't look good in yellow, kept me from buying it.  And then I started seeing yellow skirts all over the interwebs.  I mean everywhere. There is even a Yellow Skirt Gang which I didn't even know about until recently.  I decided my yellow skirt should be wool since winter is upon us.  My search for a suitable yellow wool in Richmond turned up nothing, and my relentless internet search was fruitless; yellow simply doesn't translate well on computer monitors - it always looks beige so you are unable to figure out how bright, how green, or how mustardy the yellow is that you are looking at.

So in December I had a business conference in NYC and I was determined to go to Mood Fabrics.  I tried to go last year when I attended the same conference, but I wasn't able to find the store and went to B&J Fabrics instead (where I ended up buying nothing because I was too overwhelmed by choice). This year I was prepared, and based on my Rome fabric shopping experience, I realized that having an action plan was key. During my interminable conference, I wrote up my shopping list:

1.  Yellow wool;
2.  A chambray-looking linen;
3.  Black eyelet.

Armed with my smart phone, I discovered Mood was opened until 7:00 pm, and I found it at the end of the day, skipping the elevator and walking up three flights of stairs, wearing my Gertie coat.  I was half-hoping Gertie would be there (how cool would it be to meet Gertie wearing the Gertie coat???), but alas, I saw no pink hair.

Yellow wool is easy to spot and I found the perfect mustardy yellow wool and bought 3 yards - all they had - even though I really only needed a yard for the pattern I had in mind.  I also found a good chambray-looking linen, but I struck out on the black eyelet.  Here's my haul:


My Shopping With A Plan worked; I was able to get what I wanted in the limited amount of time I had and the wool is an excellent weight.  Here's a close up so you can see the subtle weave:


So after about a year and half I had scored the exact yellow wool I had in mind . . . and then I went home to Cotton Creek, Alabama, and wasn't able to sew with it.  It was on my mind constantly, though, and the very night I flew back to Richmond, VA, I put down my suitcases and went straight to my sewing room and pulled out my TNT skirt pattern, McCalls 3341:


I have been using it for years - my pattern envelope has a copyright of 2001 - and it is still in print.  I would recommend that anyone looking for an easy skirt pattern consider this one, especially if you a beginner sewer.  It's a simple A-line skirt with only two darts in front and two in back.  No waistband, just a facing instead.  Right now, I have nine of these skirts hanging in my closet made in wool, cotton, and rayon.  I like view D, which is the red above-the-knee version on the envelope.

So here it is, an unexciting photo:


I wore it to work today with a black turtleneck sweater my mother gave me for Christmas, black tights, and black boots.  I figured as long as the yellow wasn't near my face, I'd be OK, coloring-wise:


You can see the wrinkling from sitting, but fortunately, the wrinkles don't last - this wool is very fluid and forgiving.


I really loved wearing this skirt today - it was my first work day of 2014, and going to work is always a little more fun when I have something new to wear!  The yellow is exactly as I envisioned it, and having such a bright fun skirt is wonderful for winter. 


I ended up lining it with the lining fabric I used in my Gertie coat since I had quite of bit of it.


I decided against using the yellow wool for the facings since wool can be itchy.  Instead, I used some of the leftover tablecloth fabric I used to make my 1970's skirt last summer.  All these different fabrics make the inside look pretty groovy, but I like the effect and no one can see them but me:


 The result is a comfortable waistband that isn't scratchy.  I think this skirt will get lots of wear this winter - the yellow goes well with navy blue, bright royal blue, and purple.  And I have a beautiful brown cashmere turtleneck (another Christmas present from Mother from a prior year) that will look great with it, along with some brown pumps when the weather isn't quite boot weather.

All in all, this came out as I envisioned, and I couldn't be more pleased.  And the best part:  I get to start working on my Tippi Hedren suit!