Saturday, September 19, 2015

Let's Do It Again - Style Arc Sally Jean Skirt

It seems like that I stopped sewing once I got my new Juki!  Not really, but it feels that way.  Since April, I have made a new slip from Gertie's pattern, along with two camisoles, but I don't have a dress form and it is difficult to photograph without one, so I haven't posted about that project.

Instead, I became obsessed with knitting because while I'm too tired to sew after work at night, I'm not too tired to knit.  So I started four sweaters and finished none.  As my friend, Loy, says: "Gauge lies."

What I really enjoyed about knitting was learning a new craft.  I spent a fortune on yarn, books (oh, so many books), DVDs, and notions.  I was challenged and it was fun.

And then it left me, mysteriously as it had come.  And it gave me time to think, "What do I really want to make?"

There are many garments that I am inspired to make because they look so darn cute on other bloggers.  Not necessary on me, but cute on other people.  And then there are the garments that are just so fun to make - maybe not so much fun to wear, but fun to make.

While I was thinking, I was wearing me-made clothes and I finally realized the clothing I make that I actually wear are clothes that feel good.  If something doesn't wear like your best friend, you probably aren't going to wear it, no matter how good it looks.

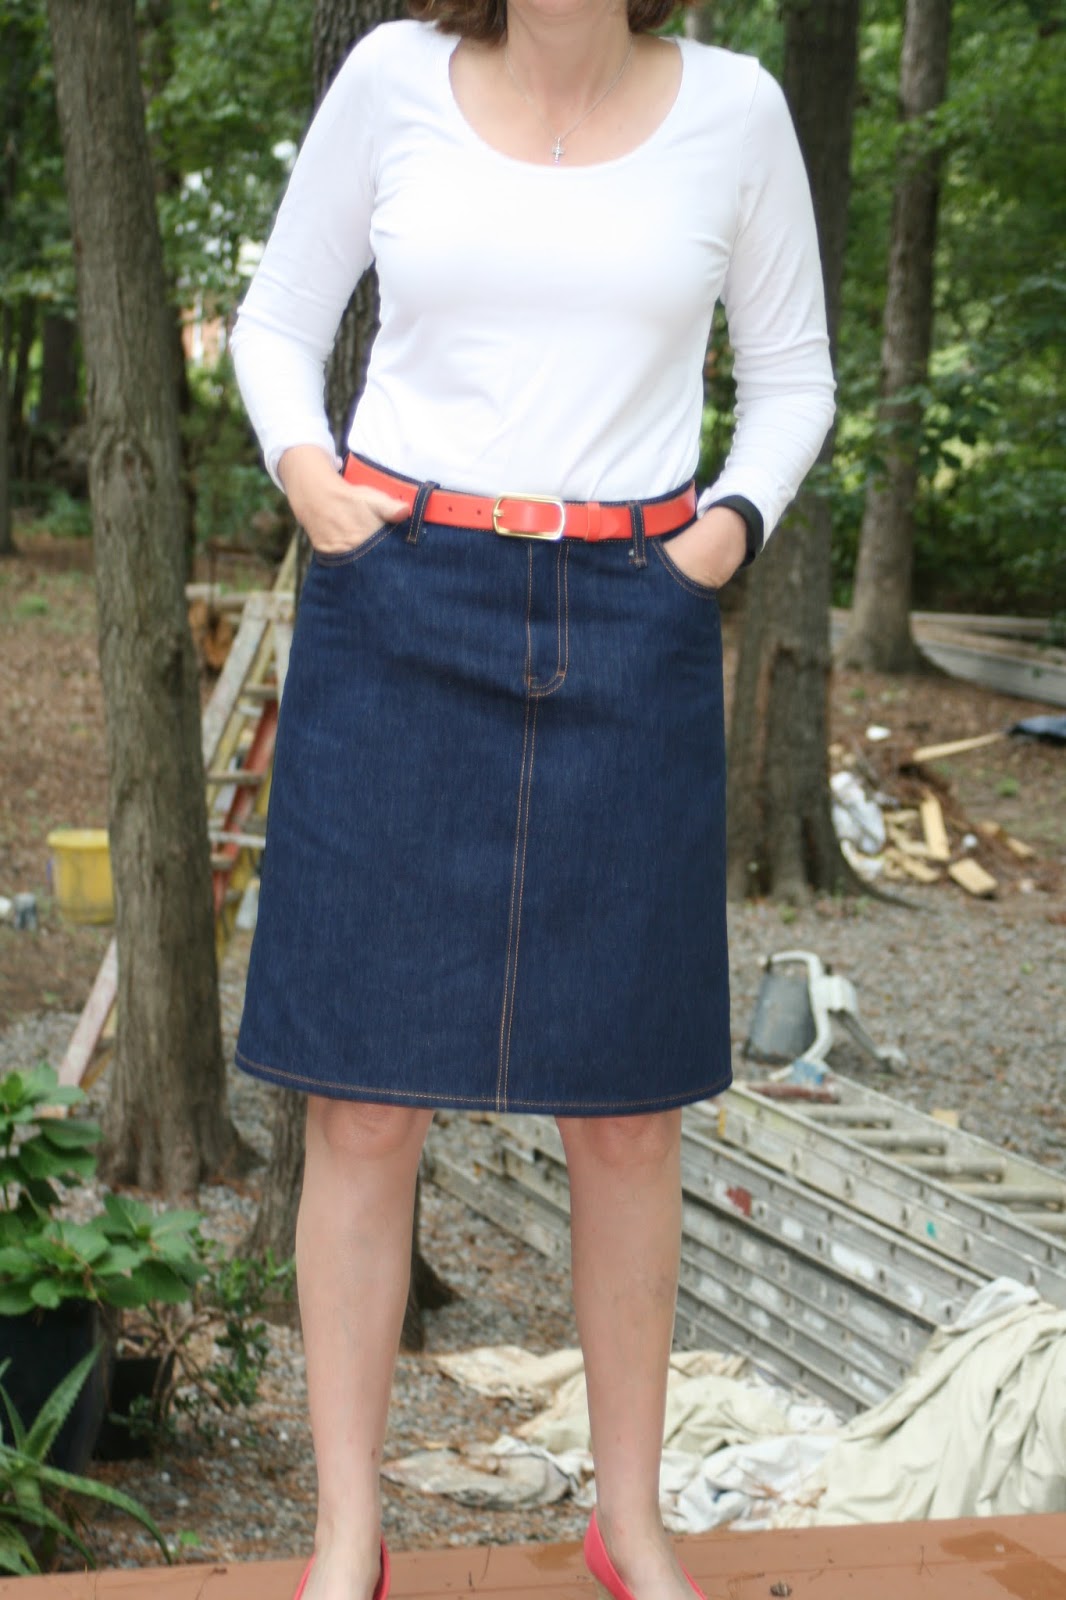
So what have I actually been wearing?  This, dear readers:


Style Arc's Sally Jean Skirt. I love, love this pattern because it is a real jean skirt, no style shortcuts involved. The white bull denim I used last year was actually meant as a wearable muslin, but it turned out so well, I stopped there and continued on with my epic jeans-making project.  I had always planned to make this again using the 13.5 oz selvedge denim from Cone Mills I bought from Taylor Tailor that I used on my final pair of jeans.

I wore the hell out of it this past summer, and with fall coming I felt it was the perfect time for a traditional denim skirt.

I had all the materials, except rivets, so a few weekends ago I cut it out and enjoyed the process immensely.  I realized this is where I have always aspired my sewing to be:  sewing exactly what I want, with all materials on hand, and all skills already mastered in order to create exactly what I envisioned.  


I used my white skirt as a reference during the sewing process and there are a few things I changed:

1.  I made the pockets deeper by about one and one-quarter inches.  I just eyeballed it while cutting out the pocket bags, rather than redrafting the pattern.  I don't always put my hands in my pockets, but when I do, I like to get my whole hand in there.  : )


2.  I put in the 3/4 inch hem the pattern specifies.  With my white skirt, I put in a 2 inch hem, and found that the bull denim shrunk on me in length nearly an inch during the numerous washings it received.  I may not have this problem with the selvedge denim, as I washed and dried it three times before using, while I only washed the white denim once, but I thought a slightly longer length would be good for fall anyway.


3.  I used a piece of SnugHug to mimic the Levis' red tag on the back pocket.  I had meant to use it on my final jeans project, but forgot.  I really like the look:

As you can see, I also added decorative stitching to the back pockets which I forgot to do for the white skirt.
4.  I used a jeans metal zipper rather than the nylon zipper I put in the white skirt.  I felt the heavier jeans material warranted the metal zipper.  A note about shortening metal zippers - I handle them the same way I shorten a nylon zipper.  Which means I shorten them at the top.  I just sew the waistband on and cut off the excess zipper tape with kitchen shears.  I don't bother removing individual metal zipper material from the excess.  So far I have been lucky, and haven't broken a needle, but I know it is just a matter of time.  I go slow, and so far it has worked out.

5.  I had to piece the waistband at the center back in order to cut the waistband on the cross grain because my fabric was only 36 inches wide.  I did this with my jeans too.  I like jean waistbands on the cross grain - more stretch, but less shrinking means more comfort in the waist area.  I covered up the seam with the back center belt holder.

Given the traditional jean material, my topstitching stood out more:


I'm fairly happy with it.  As you can see, the rivets still aren't on, and I need to order some from Taylor Tailor because I sure didn't like what they had for sale at Hancock fabrics.

I thought it was interesting to see how much my jeans had faded from the original blue.  Here are my jeans and new jean skirt side-by-side:


My photographer, The Carpenter, was not in the mood to take photos showing my entire self, and I didn't insist.  Here's my top part:


All in all, a real sewing boost to my non-existent sewing mojo! One thing that helped was multiple sewing machines:  I used my new Juki 600 for the construction, my Bernina for topstitching, and my newly repaired serger for serging the faux-felled seams.  I had a regular little sweatshop going!  It is amazing how the right tools make the job so much easier.

So what is next?  Style Arc has a narrow jeans pattern I'm itching to try it.  Also, The Carpenter, despite his grouchiness about taking photos, wants me to make him some jeans, given that the jeans fabric from Levis has gone down so much in quality.  My plan is to use Kwik Sew's pattern number 3504.  

Parting Shot:  My father died in July, unexpectedly.  Here's a photo I took of him in December 2013 in Cotton Creek, AL around Christmas time.  He's mid-story and looking so much like himself, I can hardly believe he is gone:


Monday, April 6, 2015

Fly Zip Tutorial for Simplicity 2860 Trousers

I made another pair of trousers from Simplicity 2860.  My first pair was really a wearable muslin, so for this version, I pulled out more of Vicki's awesome fabric and used a red linen/silk blend that really worked well.  The silk makes the fabric less wrinkly, and the linen gives the silk some heft.  

I made this version without the belt loops since I didn't want to have to wear a belt with them:


I still can't believe how great these fit:


The only alteration I made was to lengthen legs by 1 inch.  I'm 5'5" so I'm not terribly tall or short, but these pants legs do seem a big short.  Since the legs are straight, I just lengthened them by chalking off an extra inch right on the fabric as I was cutting out:


I also took the time to make separate pattern pieces for the waist facing.  The instructions tell you to use the same pattern pieces for the facing as you do the waist, but cut off 3/8 inch from the bottom edge for the facing.  I forgot to do this on my first version, so I just traced off new pattern pieces for the facings, eliminating that 3/8 of an inch so I won't forget again:


My insides are much improved from my first version:


Doesn't that quarter inch bias seam binding look so neat on the bottom edge of the waist facing?  Also, as you can see, I used a snap instead of a buttonhole and button in the fly extension.  I just went quick and easy on this one.

These trousers are also the first garment I made on my new Juki.  For the first pair of trousers, I didn't want to deal with a new machine and a new pattern at the same time.  For my in-the-flow skirt, I wasn't feeling well and still didn't want to figure out my new machine.  Finally, I realized that bonding with a new sewing machine is like learning a new language - the only way to get fluent is total immersion.  So I packed away the beloved Bernina, and spent a good portion of time making these pants.  Everything was hard - what foot do I use for the overlock stitch?  WHERE is the overlock stitch?  How do I change the needle position?  Everything had to be looked up in the manual.  It was a bit frustrating, but it will get easier with time.  Once that happens, I'll post a review.

In the meantime, I want to post a fly zipper tutorial for these pants.  This is a great pattern, and I wouldn't want someone to pass it by just because they have never done a fly zipper or they aren't that experienced with them.  

The instructions with this pattern have you do the fly zipper first thing, which appears somewhat unique - most trouser/jeans patterns have you dealing with the back pattern pieces first with darts, pockets, etc.  What is good about these instructions is that you get the fly zip done right away so there isn't any fretting about it.

For the fly zip you need three of the pattern pieces, numbers 3, 7, and 8:


Number 3 is the trouser front pattern piece, number 7 is the fly, and number 8 is the fly extension (the instructions call it the "underlap"; I call it the fly extension).  There are three markings that are really important in putting in this fly zip, so be sure when you are cutting out that you mark them.  The first is the big dot on all three pattern pieces:


The big dot is important so that everything lines up correctly and your topstitching doesn't hit the end of the zipper and break your needle.  The second are the two notches on all three pattern pieces:


And the third is the center of the front of the pants, which I am pointing out on the front pattern piece:


This marking is important because you want this marking on the right and left sides of the front of your pants to match up when you zip up your zipper.  That way you will know it is a) correctly installed; and b) your waist is the correct size.

OK, cut out your pattern pieces.  Step one of the instructions tells you, "To reinforce front, stitch along seam line for about 1" each side of large dot, stitching through large dot."  Here's my large dot on the front pattern pieces marked:


And here I have reinforced 1 inch on either side of the large dot:


Do this for both the left and right fronts.  

Step two tells you to sew the two fronts together from the notch to the big circle.  This is what they are talking about:


Here are my two fronts sewn together from the notch to the big circle:


Step two then tells you to clip the right front pants piece to the reinforced large dot:


(To make sure you are clipping the right front pants piece, hold the pants up to you like you are wearing them, and identify which side you will be wearing on your right.)

The next thing you want to do is take the fly piece (number 7) and sew it onto the right side front piece.  But what the instructions don't tell you is that it would be helpful to finish the curved edge of the fly before you do this.  You can use a serger, or use the overlock stitch or zig-zag stitch on your sewing machine.  I think finishing the fly this way will make the inside of your pants a lot neater.  Here you can see my fly piece.  I just used my Juki's overlock stitch (once I figured out which foot to use and which numbered stitch it was!):


OK, now that your fly is finished so prettily on the curved edge, we can return to the instructions.  Step three says, "With RIGHT sides together, pin fly to RIGHT front edge, matching large dots.  Stitch above large dot.  Trim seam above clip to 1/4"."

Here I have sewn the seam.


And here I have trimmed the seam to 1/4 inch:


Step four has you press this seam towards the fly:


Next you want to flip over to the right side and give another good press:


OK, now we are ready to begin zipper insertion.  Step four continues, "Place closed zipper, face down, over fly, with lower end of zipper about 1/4" above large dot and zipper tape extended 1/4" over fly seam, as shown.  Stitch zipper on RIGHT edge of tape, as shown, using an adjustable zipper foot.  Turn up lower edge of LEFT zipper tape to keep it out of the way as shown."

It's my opinion that Simplicity's diagrams on this step are lacking.  So this is what you want to do. The first photo below shows the zipper placed down upon the fly, and the end of the zipper 1/4 inch above where the large dot is marked:


And this second photo shows the zipper teeth about 1/4 inch from the fly seam:


Once I had the zipper placed as above, I pinned the left zipper tape to hold the zipper in place, and then sewed the right zipper tape:


Then, as per the instructions, I turned up the lower end of the left zipper tape to keep it out of the way:


Step 5 has you turn the fly to inside along the seamline and press which I did:


Step six actually has you sewing your zipper topstitching which is a surprise because for the zipper flys I have done, this is usually the last step.  But I am happy to do the topstitching in step six and get it over with because I usually stress about it since is the only visible part of the zipper insertion anyone will see.

But the instructions in step six have you basting the stitch line and all that, which I don't do.  This is how I mark where to topstitch:  I take pattern piece 3 and I trace onto a scrap piece of tissue paper the shape of my topstitching:


Then I place it on top of my right front piece:


And stitch around the edge:


Then remove the tissue template:


And ta-da!!  Topstitching done with no marking or basting.  Basically, front fly topstitching without tears.  (I'm using red thread, of course, so y'all can see what I am doing.)

OK, the right side is done.  Let's work on the left side.

Step seven says, "Make a 3/8" clip at large dot in LEFT front.  Press under 3/8" above clip."  Here I have clipped and pressed:


Step eight says, "Open zipper.  Pin left front over zipper tape close to teeth.  Baste."  So here you can see I nestled the left front folded edge close to the zipper tape:


And I actually hand baste the zipper to the left front edge, which is one of the few times I ever hand baste ANYTHING:


The reason I'm handbasting is you have two layers of fabric on the left front edge that need to be attached to the zipper so it doesn't move when you sew it in.  Once you have it basted, close the zipper tape to make sure the zipper is covered by the right edge of your pants and that the front center marks line up with each other:


But don't permanently sew the zipper in yet.  We need to baste the fly extension in first.  Take pattern piece number 8 and follow Step nine instructions, "With RIGHT sides together pin fly extension sections together, matching large dots.  Stitch curved unnotched edges together.  Trim seam; clip curves."  That's easy:


Here I have sewn the curved edge and trimmed the seam.  Then I turn it to the right side and press.  Step 10 has you baste the raw straight edges together which I did:


What Step 10 doesn't tell you is to finish that straight raw edge.  Again, your trouser innards are going to look better if you finish that edge:


The rest of Step 10 instructions is a little confusing in my opinion.  Here's what you do: line up the edge of the fly extension with the folded left front edge (remember, you folded it to the wrong side 3/8 of an inch).  Here's a photo of me beginning to line it up:


The straight edge of your fly extension is going to line up with the raw edge of the left front pants, with the zipper tape sandwiched between them.  Then you baste the fly extension in place.  I use Steam-A-Seam for this step:


Then flip everything over to the right side, and sew the zipper close to the zipper teeth, using a zipper foot to get close:


And guess what??? You are done!!  Give the front of your pants a good press and admire them:


Of course take out any stray basting threads or stay stitching threads (which I didn't completely do above).  The last of the instructions, Step 11, has you hand-tack fly and the fly extension "as shown".  As far as I am concerned, this is an optional step.  I didn't do it for my first pair of pants from this pattern but I did do it for the linen/silk pants above.  You want to tack right where my thumb is on the photo below:


But I didn't hand-tack it; I just machine stitched it a few times and called it done.  I also trimmed the end of the zipper so it wouldn't show so much.

I hope this helps.  One of the reasons I love reading blogs is not only for inspiration, but so as to become a better sewer.  Hopefully, this tute can help someone a little farther down the line in fly zip expertise.  Let me know if you have questions, I love to help!