Sunday, July 27, 2014

A Re-Fashion Experiment & Kwik Sew 2976

Recently, I went through my closet and did what you are supposed to do - pull out everything you haven't worn in a year.  I generally oppose this approach because I'm an emotional clothes hoarder - I'll keep something I'm not wearing if I just have really good memories of wearing it.  (Case in point:  my college jeans.)

Now this clear out did not include all the clothes I own.  It didn't even include all the clothes I had in my closet.  It only included the clothes hanging up in my closet.  I counted approximately 160 items.  By eliminating everything I hadn't worn in a year, I removed 53 garments.  O.K., I confess, I didn't get rid of them all; I actually returned 28 garments back to the closet because I wasn't ready to part with them.  But I did manage to give 25 away (11 of which were made by me).  By my math skills (which are admittedly poor), I figure I gave away 22% of my hanging stuff.

Out of pure curiosity, I counted how many skirts I own.  Forty-six.  Wow.  Of those 46, 17 were store bought and 29 were made by me.  Wow again.  That's a whole lot of skirts.  I'm not certain anyone needs 46 skirts.

What did I learn from this exercise?  I have plenty of clothes.  I don't really need more.  But my problem is that clothes making is my hobby, so what am I to do?  Giving them away is the answer, of course, but in addition to emotional clothes hoarding, I hate to give away something I've made because of what it really is:  a muslin.  Let's say I make a dress.  Let's say I love it.  Let's say that after 4 or 5 years, I'm not wearing it anymore, but I want to make another one with new fabulous fabric.  I'm going to want to try on that old dress to see how it fits - do I need more room in the waist? (Rarely does anyone need less.)   What size seam allowances did I use?  How did I finish the armholes?  Etc.

So I've decided to approach my garment making in the future as more of an experimental exercise rather than a I've-got-to-sew-this-because-I-need-something-to-wear.  I keep thinking I'm clothes poor, when I'm really not.

One of those experiments that I read a lot about but haven't actually tried is re-fashioning a garment from one thing into something else.  I'm not normally one for re-fashioning a garment, although I admire those who do; I prefer to start with a completely clean slate on a project because re-fashioning is dangerously close to altering or even mending.  (Shudder)

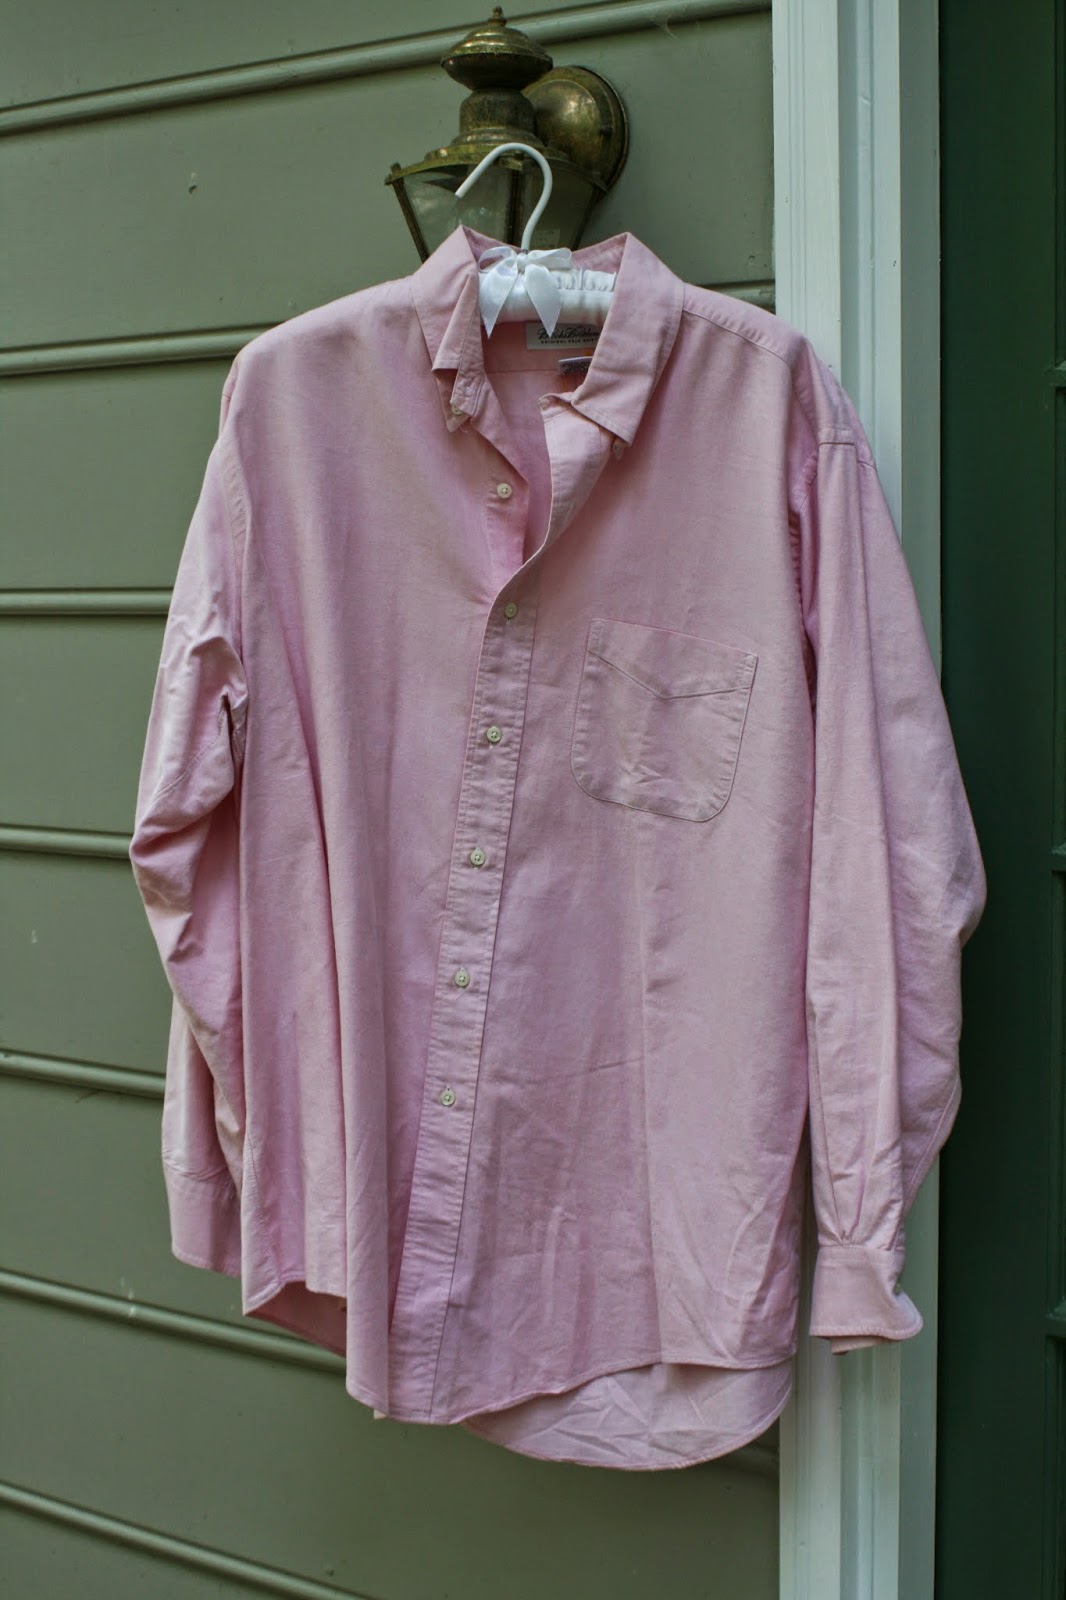
I got inspired though, because we have a nice thrift store nearby, and I wanted to see if I could take a man's shirt and make something of it.  Here it is:  a high-end Brooks Brothers oxford shirt that I got for $ 3.00:


I decided the bigger, the better - this one is a size 17:


The fabric was excellent quality, and the only thing wrong with it was a little ring around the collar.  

I doubted my ability to simply take the shirt and play around with it - I need a pattern.  So I dug through the pattern stash and found Kwik Sew 2976:


I felt like I could make this work - the pattern doesn't take much fabric, so I wouldn't need any more than the button down I had purchased.  It also had the button front and I wanted to see if I could use the button placket and buttons on the existing shirt for my new shirt.  I could and I did.

So I went from this:


To this: 


Here I am in it:


Frankly, it turned out better than I expected.  To make sure the buttons and buttonholes matched up, I cut out the shirt with the original shirt buttoned up.  I laid the front pattern piece with the center front line down the center of the buttons and cut out the left side.  Then I flipped the pattern over, again lining up the center front line with the center of the buttons and cut out the right side. 

I used french double bias binding cut from the shirt fabric to bind the neckline, but I used washed shantung white silk bias binding I had in my stash for the armholes; I found the oxford cloth to be rather thick for binding:


I put on a bias band at the bottom rather than a traditional hem, cutting the bias bands out of one of the sleeves of the man's shirt.  I cut them 2 inches wide, folded the band in half to one inch and then sewed it on with a 1/4 inch seam allowance.  It gives a little visual interest rather than a usual hem.


Here's a close up of the button placket:


For three dollars and one sewing day worth of work, it came out pretty well.  Actually, the hardest part of the project was removing the front pocket - it was sewn on with tiny stitches and it took awhile to wrestle it off.  You can still see the outline of the pocket on the front of the shirt, but I hope that fades a bit in the wash.

I also wasn't prepared for the left/over right buttoning when I tried it on for the first time - I had forgotten that men button their shirts left/over right rather than right/over left like women do.  Only then did it occur to me that I could achieve the right/over left by cutting the shirt pattern pieces upside down to the original shirt.  I'll keep that in mind if I ever do something like this again.

All in all, a good experiment.  I like the shirt, but don't love it, but that could change with the wearing.  This shirt pattern from Kwik Sew isn't particularly close fitting or flattering, and I'm certain there are other patterns out there than can work better.  But this pattern was a good place to start because it was "free", i.e. already in the stash.

Sunday, July 20, 2014

A Tale of Two Skirts

In between jeans muslins, I've been sewing skirts.  And other things.  But mostly skirts.  Skirts are what I live in all summer because a skirt, a tee, and a pair of sandals is the coolest, most comfortable outfit in summer.  I realized this week I don't even own a pair of shorts, and went to buy McCalls shorts pattern, number 6930, because it was on sale for $ 1.99, but Hancocks was out of stock. I'm actually wearing a pair of The Carpenter's cut off jeans today, but I digress.

First up was Simplicity 1541, which is a basic straight skirt:


I've been meaning to try this one, not only for it's basic style, but also because it is part of Simplicity's "Amazing Fit" line and I wanted to find out if it was really "amazing".  It also allowed me to use my leftover pink denim that I used for my latest incarnation of the Gertie pants.  I made view B, the middle length version.

One of the features of the pattern is that is allows different pattern pieces for different figures: the choices are slim, average, and curvy.  Sort of the same concept as cup sizes for the bust that many patterns have these days.  And the pattern sheet provides detailed instructions to determine what you are, but let me save you time:  if you have less than 10 inches between your waist and hip measurements, you are slim; if you are 10 inches you are average; and if you are more than 10 inches you are "curvy".

More helpfully, the pattern provides detailed hip finished garment measurements for each size and each "fit".  This allowed me to determine that, unlike most Big Four patterns, there wasn't a lot of ease in this skirt.  My measurements put me as size 14, and since there are 10 inches between my waist and hip (depending on whether I've eaten pizza or not), I am "average", not surprisingly (I have pretty standard figure).  The finished hip garment measurements for a size 14 average is 39, which seemed too tight, since that is my exact hip measurement, but this pattern is drafted with 1 inch side seam allowances for better fitting.

I went with it.  The instructions seemed to create more work than necessary, but I reminded myself that I'm trying to do things new ways with new techniques so I don't get bored, so I did it their way.  You are instructed to baste the front yoke to the front of the skirt, and then baste the back yokes to the backs of the skirt, and then baste the side seams with a 1 inch seam and try it on.

My skirt was tight, like indecently tight.  The pattern instructions have all kinds of fitting tips, like what to do if you side seam pulls to the front or to the back, but my side seams were completely straight, the thing was just too tight.  The instructions tell you pull out some of your basting stitches and pin until you get a straight seam, but I couldn't remove the side seams while standing in it, so I eyeballed it and decided the whole thing would fit better if I used 3/4 seams instead of 1 inch, thus giving me 1 inch more of ease in the skirt.

I basted the 3/4 inch side seam, and then removed the 1 inch seam and tried it on.  Very good fit.  But of course, by doing it this way, I then had to remove the 3/4 basted side seam, and remove the yokes from the skirt, sew the front and back yokes together for real, and then sew the side seams for real this time, using the 3/4 inch seam allowance.  Then attach the yokes to the skirt. Whew.  A lot of work for a simple skirt:


Once I got it all done, though, with the yoke facings and zipper and everything, the waist felt a little loose.  Grrrr.  Did my waist stretch while putting in the yoke facing?  Was it the lycra in the denim?  I don't know, which just goes to show, no matter how much you fit as you sew you never really know until you are done, done, done.

I made the front seams a mock felled seam since I have been doing that on my jeans muslins:


The inside view of the mock felled seam:


And I put in my first lapped zipper, which I've never done before, but again, I'm trying new things so I don't get bored:


A pretty good first effort, but I'm not convinced of its superiority to the centered zipper.  

The skirt has a back kick pleat:


All in all, I'm very pleased with this skirt (its an excellent work skirt) although next time I might try a 7/8 inch side seam and see how that works.  I think it depends on your fabric and its stretch, so I won't know until I make it.

Next up was Vogue 1247:


Where have I been?  This pattern was named one of the top 10 patterns of 2011, I think, but I was totally oblivious.  Everyone on the interwebs seems to love, love, love this skirt, with the front in-seam pockets, although most sewers are adding 5 to 8 inches to the length.  As drafted it finishes 15 inches long.  Which is fine if you are a teenager, not so good if you are over 45 years old.

I knew I wanted to make this in a soft cotton twill - the kind you would use to make a great pair of chinos.  I knew I also wanted to make this skirt so I could wear it at the beach, so I chose a soft grayish blue (or a soft bluish gray, I can't tell) from fashionfabricsclub.comhttp://www.fashionfabricsclub.com/p710_12372-sea-glass-blue-twill.  The color reminds me of bleached-from-the-sun beachwood.

I made a size 14 but added 5 inches as I figured 20 inches was a good length on a summer beach skirt.  I didn't add the length to the pattern pieces; I just chalked it out on the fabric since it was a pretty straight forward alteration.

Here's the hands-in-the-pockets obligatory photo that everyone who has made this skirt has posted:


And the back:


I used a centered zipper and a button in the back, rather than a hook and eye closure.  I also put in a top-stitched hem rather than the blind hem as instructed. The pattern called for some serious seam binding that included the side seams and pockets - the photos of some of the insides of the skirts on everyone's blogs are neat to see, but I wasn't inspired to rise to that level of effort - I just used my overlock stitch on my Bernina to finish the seams and called it a day.

A lot of the sewers who made this skirt have made multiples, but strangely, I don't feel the urge, even though I ordered another cotton twill in anticipation that I would want to.  I might make this in corduroy or wool come this fall, adding another couple inches.  We'll see.

Vogue has a reputation of being slightly more difficult that the other Big Four, and I admit that while this is a simple skirt, more than once I had to think about how things went together, and not every little step is illustrated in the instructions.  But there was nothing anyone will some sewing experience couldn't figure out.

More on the jeans project to follow, but that's all for now!

Parting Shot: The Carpenter and some of his brothers before we were evacuated from the island due to Hurricane Arthur: