Sunday, October 27, 2013
More Progress on the Coat Sew-Along . . .
I spent today taking care of those last steps before the coat lining and outer coat are sewn together. The first is step 17 in the instructions, where you cut bias strips from your interfacing and fuse them to the hemline of your garment fabric. Instead of cutting the bias strips when I initially cut out the pattern pieces, I waited until the skirt of the coat was constructed so I would know how many I needed. Most patterns have the finished lower width of the garment printed on the back of the envelope, but Butterick 5824 doesn't.
So I cut the 3 inch strips on the bias, and the instructions tell you to fuse the strips 5/8 of an inch below the hemline on the wrong side of the coat skirt. Given that the hem on this coat is one and half inches, I did the math and that means that you need to place the bias strips 7/8 of an inch from the edge of the skirt like so:
I used my seam gauge to measure the 7/8 inch and then I pinned the interfacing strips with silk pins to the coat skirt. I probably didn't need to do such careful measurement and placement - getting the strips a little above or a little below 7/8 of an inch isn't going to make much difference.
I used plenty of steam to fuse the strips, pressing over the pins initially, and then removing them after the strips were fused well enough. Then I used a lot more steam for the final press:
You can see that the ripples at the top of the interfacing strip were completely eliminated by the pressing:
The interfacing strips are going to provide a stable surface for the coat's hem, and reinforce the coat's bottom edge. (In hindsight, I probably should have used black interfacing for this step as the lining of this coat is free-handing, but I wasn't going to put this project on hold just so I could order black interfacing and wait for it to arrive on the off chance that a breeze might cause my hemline to show one day.)
The second step was hemming the lining. The instructions have you hem the lining now before you attach the lining and outer coat together because it is easier to deal with just the lining. Hemming the lining just means folding the lining edge up 5/8 of an inch, and then folding the raw edge towards the folded edge, and then top stitching. It's simple, but not easy. My polyester lining needed lots of heat and steam to get a good crease for both folds, so I experienced a lot of burned fingers. It was fussy work, and this coat skirt is, as I have mentioned before, really, really voluminous. I spent an hour and forty-five minutes getting the lining hem pressed, pinned, sewn, and pressed again.
I took a break at that point, and contemplated going ahead and attaching the lining and outer coat together, but I decided to wait for another day - one thing I have learned on this project is that sewing when you are fresh and energetic yields much more pleasing results. And it is more fun.
I've been reading and re-reading Gertie's posts on the final steps which are really helpful and contain tips that aren't in the pattern instructions, i.e. how to grade the seam allowances depending on the collar roll line, etc. Hopefully, I'll be able to complete step 32 of the instructions next weekend.
Saturday, October 26, 2013
It's That Coat Time of Year . . .
For most of September and October I was in a sewing funk, despite the fact that I made a dress (which I haven't blogged about yet) and I half-heartedly began cutting out a new dress (which I haven't even finished laying out yet). I think the funk was because of two things: 1) we were in between seasons and I couldn't seem to get much enthused about sewing for summer or winter; and 2) work has been exceptionally busy and I've gotten so behind that my mind is too cluttered to sew. And here I thought I sewed to escape work, but it turns out that I'm one of those people that needs to be caught up at work and on top of things in order to free my mind for sewing. So having experienced our first frost, and feeling pretty good about work last night, I announced to the Carpenter that Saturday would be The Day to return to my personal coat sew-along, Butterick 5824, the coat that Gertie designed.
When we last left off (on June 23rd!), I had completed the outer shell of the coat, and I was feeling pretty good about the whole project. My bound buttonholes weren't perfect, but they functioned, and I was starting to hope that this project might actually happen! Then I did what I usually do - I continued to research it ad nauseum by Goggling the pattern number and reading every single blog out there that made this coat. And I found that a lot of bloggers seemed to cease progress at this exact point, where the outer shell of the coat was constructed. This was puzzling because so many of the bloggers were amazing seamstresses - how could this be?????
After exhaustive reading, I could only surmise that Perfection had reared its ugly head. Many of the bloggers seemed stuck on - what appeared to me - imagined imperfections in their work. There were beautiful coats in progress, but I think a lot of the coats just weren't coming together according to the vision of the maker. I suffer from this malady as well, and I try to remember that sometimes art happens when you create something that you didn't intend.
I think the other reason that some sewers stopped making progress was the realization that the next step was making the lining, which was basically making the entire coat all over again. No small feat, given the amount of skirt on this coat.
So the very next day, on June 24th, I decided to cut out the lining. I figured that if I didn't get the lining cut out, I could procrastinate on this thing 'til spring, and by finishing the cutting out it would boost the odds that this coat got done.
Fortunately, I found that the lining pieces could be cut in a double layer lay-out, contrary to the instructions. I also found that I had bought seven yards of lining fabric, which is the twice the amount I needed. That was puzzling - did I click "add to cart" twice when I bought it from Gorgeous Fabrics? I don't know, but having that much fabric allowed me to stop worrying about conserving fabric, and I just laid down the pattern pieces and got everything cut out that Monday evening. Yay.
And there the lining pieces sat for the next four months. It felt good to pick them up this morning and put together the bodice lining, and the skirt lining, and then join the two together. Here is the finished lining:
I finished my skirt seam allowances by pressing them together, rather than open, and trimming them to 3/8 inch. I then used my overlock stitch on my Bernina to keep them from unraveling. I had no troubles with the lining construction except for joining the lining to the outer collar at the pivot points:
But other than the pivot points, the slippery lining wasn't that bad to work with, and I think it is going to be perfect for this coat. I'm getting excited about getting it done (again), and I hope to have it done in time for the opening of the Hollywood Costume exhibit at the Virginia Museum of Fine Arts. I would love to wear it to see this exhibit which was organized by the V&A Museum in London.
The next step is to join the outer shell and the coat lining together, but first, I want to hem the lining before attaching it to the coat (it will be easier to hem with less coat to deal with), and I need to cut my bias strips from the interfacing and fuse them to the outer shell hemline (which is step 17 of the instructions).
So onward and upward. I have to remember not to let the perfect become the enemy of the good; or, done is better than perfect!
Monday, September 2, 2013
Happy Labor Day - Patriotic Marian Martin 9212
Happy Labor Day, y'all! To celebrate, I finished my red, white, and blue vintage patriotic dress this weekend. This is the dress I set aside to make the Anna Dress, but I spent yesterday getting this one all put together and I impressed The Carpenter into service this morning for photos.
I really like the collar and pockets on this one and the size was bust 34, waist 28, which is perfect for me. There's no date on the pattern, but given that this is a mail order pattern, the postmark shows this was mailed on March 22, 1954:
And it was sent to Mrs. J.D. Coll here in Richmond, VA, which means I got this pattern several years ago at Bygones when they still carried vintage patterns:
I had originally planned to use this plaid voile which has been aging quite nicely in my stash:
But I was concerned that the voile might be too light for the pattern. Plus, I thought I should break out of my habit of making patterns in the exact design fabric shown on the illustration and think outside the box. So I found some lightweight cotton sateen in a blue & white colorway I bought from fashionfabricsclub.com many years ago.
This pattern is unprinted, and I have avoided using unprinted patterns after giving them a try not long after I began sewing. I quickly gave up, and now I realize I just didn't have the sewing experience to deal with them. Now I do, and I would say I'm a converted big fan. Here is an example of a pattern piece:
All the pattern pieces are already cut out (obviously, since there are no lines to show you were to cut), so the whole step of cutting your pattern pieces is eliminated. As you can see, this is pattern piece number 7:
You can also see where the notches are already cut out, which is also helpful for marking. Small holes show your grainline:
This piece shows it was to be cut out on the bias since the grainline holes are at a 45 degree angle on this pattern piece. One advantage I discovered with unprinted patterns - the holes for darts, pleats, etc. make it easy to mark your dress on both sides - I suspect the holes made making tailor tacks easier, but they also allow marking by washable marker easier.
The hem allowances on this pattern were 1/2 inch which I thought would be a challenge for me, but I never forgot. Like most vintage patterns, though, the instructions were sparse. No interfacing was called for and the button size was not specified. As a beginner, I would have been perplexed by all of this, but now I was able to make the judgment call to use fusible interfacing on the bodice facing where the buttons and buttonholes go. Also, I chose the buttons I liked and were available rather than what any pattern called for. Here is the result:
I think the busyness of this fabric obscured some of the pattern lines. The front bodice has four pleats and the back has two darts. The bodice ended up being more blousey than I had originally envisioned:
Here's a close up of the pocket:
I really liked the shape of the pocket front, but I felt like the busy navy and white print was going to make it difficult to see, so I used a contrasting red and white polka dot print for the back of the pocket to make the pocket shape stand out. My original plan was to use red or white piping around the pocket, but that right angle in the middle of the pocket was just too much of a challenge, so I went with the red and white polka dot background for pop. I was concerned that the red pocket took this dress from "vintage" to "kitchey" but then I decided I didn't care. I'm wearing it today in honor of our national holiday, although after the photo shoot I took off the pearls and heels and put on some sandals.
Here's a vintagey photo taken by The Carpenter!
Here's my pattern, Marian Martin 9212:
And it was sent to Mrs. J.D. Coll here in Richmond, VA, which means I got this pattern several years ago at Bygones when they still carried vintage patterns:
I had originally planned to use this plaid voile which has been aging quite nicely in my stash:
But I was concerned that the voile might be too light for the pattern. Plus, I thought I should break out of my habit of making patterns in the exact design fabric shown on the illustration and think outside the box. So I found some lightweight cotton sateen in a blue & white colorway I bought from fashionfabricsclub.com many years ago.
This pattern is unprinted, and I have avoided using unprinted patterns after giving them a try not long after I began sewing. I quickly gave up, and now I realize I just didn't have the sewing experience to deal with them. Now I do, and I would say I'm a converted big fan. Here is an example of a pattern piece:
All the pattern pieces are already cut out (obviously, since there are no lines to show you were to cut), so the whole step of cutting your pattern pieces is eliminated. As you can see, this is pattern piece number 7:
You can also see where the notches are already cut out, which is also helpful for marking. Small holes show your grainline:
This piece shows it was to be cut out on the bias since the grainline holes are at a 45 degree angle on this pattern piece. One advantage I discovered with unprinted patterns - the holes for darts, pleats, etc. make it easy to mark your dress on both sides - I suspect the holes made making tailor tacks easier, but they also allow marking by washable marker easier.
The hem allowances on this pattern were 1/2 inch which I thought would be a challenge for me, but I never forgot. Like most vintage patterns, though, the instructions were sparse. No interfacing was called for and the button size was not specified. As a beginner, I would have been perplexed by all of this, but now I was able to make the judgment call to use fusible interfacing on the bodice facing where the buttons and buttonholes go. Also, I chose the buttons I liked and were available rather than what any pattern called for. Here is the result:
I think the busyness of this fabric obscured some of the pattern lines. The front bodice has four pleats and the back has two darts. The bodice ended up being more blousey than I had originally envisioned:
Here's a close up of the pocket:
I really liked the shape of the pocket front, but I felt like the busy navy and white print was going to make it difficult to see, so I used a contrasting red and white polka dot print for the back of the pocket to make the pocket shape stand out. My original plan was to use red or white piping around the pocket, but that right angle in the middle of the pocket was just too much of a challenge, so I went with the red and white polka dot background for pop. I was concerned that the red pocket took this dress from "vintage" to "kitchey" but then I decided I didn't care. I'm wearing it today in honor of our national holiday, although after the photo shoot I took off the pearls and heels and put on some sandals.
Here's a vintagey photo taken by The Carpenter!
Monday, August 26, 2013
A Break from Shirtdresses - The Anna Dress!
The British blogosphere is abuzz with the Anna Dress from By Hand London! I finally gave in and bought it when I saw the Anna Rose dress by Lizzy and Taracat's second version where she dances solo in front of the camera. Because, really, how can you resist a pattern that makes you dance? I actually put the vintage shirtdress I was in the process of making aside to make this dress, which never happens.
Without further ado:
An invisible zipper was really required of this dress since the neckline was so narrow - the pattern calls it a "slash neckline" which is a term I've never heard before. As anyone who has read my blog for more than five minutes knows, I'm not a fan of sewing invisible zippers, but this one was okay, I guess:
Okay, here are the details:
For me, who buys the big four patterns when they are on sale for $ 1.99, this was an expensive pattern. The cost of the pattern, plus shipping, plus the exchange rate, all added up to nearly $ 27. Since I spent so much on the pattern, I felt duty bound to trace the pattern off just in case I guessed wrong on the size. As you know I hate tracing patterns; I don't hate it as much as I hate putting in an invisible zipper, but I still hate it.
To make it palatable, I copied the facings on a regular copy machine, using 8.5 x 14 inch paper. Problem solved there. Then I traced the bodice front and back - I really didn't have much choice about tracing the front bodice as the slash neck and the v-neck were on the same bodice piece and I wanted to make sure I could make the v-neck version later.
I used a cotton lawn called "Modernology" by Art Gallery Fabrics which was 60 inches wide. This pattern works best with a drapey fabric that is opaque enough not to show your unmentionables. I originally wanted a rayon challis which has lovely drape, but I couldn't find one I liked locally, and I'm hesitant to buy rayon challis on-line as rayon challis quality can really only be determined in person. I've used Kaffe Fassett rayons with great success - they are very high quality, but all others are suspect until I make my personal inspection to make sure they aren't too thin or too wrinklely.
Interestingly enough, the instructions don't have you use any interfacing on the facings. That was different, and I just rolled with it. It worked great - the lack of interfacing meant the facing wasn't too stiff for the dress. (I suspect modern patterns probably have us interfacing way more pattern pieces than necessary.) The bodice was easy - four pleats in front, two darts in back, sew on the facings, and hem the sleeves with a 1/2 inch hem (I topstitched mine).
I tried on the bodice and decided the size I choose - size 8 US/12 UK - was perfect and didn't bother tracing the four skirt pattern pieces. I couldn't stomach it. Not only were there four pieces, but each piece was nearly 48 inches long. My tissue paper would have to be piece together to even begin the tracing. Life is too short.
It all went together in a day. I used french seams on the skirt since your seams tend to show when you walk because of the slit. They weren't hard; it was just a lot of straight sewing.
I held off on hemming until the next day, which was the smart move. At five foot five inches, I don't think of myself as short, but hemming this dress was the most challenging part of the whole shabang. Before I cut out the skirt, I measured the length of a maxi skirt I had made a couple of years ago, and figured I could wack about six inches off the skirt pattern. I have, however, learned to rely on my math at my own peril. So I limited my wacking to only 3 inches when I cut out the skirt. After trying it on repeatedly (I really do need to get a dress form!), I turned the hem up another two and 5/8 inches. I then trimmed the hem allowance to one and 1/4 inches, turned the raw edge towards the hem fold, and then machine stitched down the hem 5/8 inch from the fold.
Before I even finished the dress, I bought some fabric to make the "midi" version - the shorter version whose skirt is about 23 inches long - but after wearing the maxi dress all day, I can't imagine wasting time making the shorter version; the maxi dress is just so fabulous to wear. The long skirt, with the slit, moves in such a wonderful way that feels elegant and lovely. (My photos just don't capture this; Lizzy's photos of her Anna Rose dress does.) This dress is both modern and old fashioned at the same time. Your skirts swish in a most expressive way - you can swish the skirt as you turn a corner, or you can pull your skirt back to show your disgust, which isn't possible with a short skirt, much less pants.
Not to mention how the long skirt makes you look tall and thin!
The best thing that By Hand London did with this pattern was provide the finished garment measurements with their instructions - this is vital in choosing the best size, and something independent pattern makers usually fail to do. The size 8 US/12 UK had finished measurements of 36 bust and 28 1/2 waist - I knew this would work for me.
To say I want to make the v-neck version now is like saying RGIII wants to play football. And I've spotted a nice black-and-white rayon challis print at the local Hancock's I'm waiting for to go on sale. So if you live in Richmond, don't buy it all before I get there, 'kay?
Without further ado:
Okay, these aren't the best photos - I thought taking them outside in the sunlight would be better, but no dice. Here's a close up of the bodice:
An invisible zipper was really required of this dress since the neckline was so narrow - the pattern calls it a "slash neckline" which is a term I've never heard before. As anyone who has read my blog for more than five minutes knows, I'm not a fan of sewing invisible zippers, but this one was okay, I guess:
Here's the skirt slit which I lowered several inches, so that it hit about four inches above the knee. The original marking was much higher than I felt decency allowed:
Since I wore it to work, I wore it with a sweater:
Okay, here are the details:
For me, who buys the big four patterns when they are on sale for $ 1.99, this was an expensive pattern. The cost of the pattern, plus shipping, plus the exchange rate, all added up to nearly $ 27. Since I spent so much on the pattern, I felt duty bound to trace the pattern off just in case I guessed wrong on the size. As you know I hate tracing patterns; I don't hate it as much as I hate putting in an invisible zipper, but I still hate it.
To make it palatable, I copied the facings on a regular copy machine, using 8.5 x 14 inch paper. Problem solved there. Then I traced the bodice front and back - I really didn't have much choice about tracing the front bodice as the slash neck and the v-neck were on the same bodice piece and I wanted to make sure I could make the v-neck version later.
I used a cotton lawn called "Modernology" by Art Gallery Fabrics which was 60 inches wide. This pattern works best with a drapey fabric that is opaque enough not to show your unmentionables. I originally wanted a rayon challis which has lovely drape, but I couldn't find one I liked locally, and I'm hesitant to buy rayon challis on-line as rayon challis quality can really only be determined in person. I've used Kaffe Fassett rayons with great success - they are very high quality, but all others are suspect until I make my personal inspection to make sure they aren't too thin or too wrinklely.
Interestingly enough, the instructions don't have you use any interfacing on the facings. That was different, and I just rolled with it. It worked great - the lack of interfacing meant the facing wasn't too stiff for the dress. (I suspect modern patterns probably have us interfacing way more pattern pieces than necessary.) The bodice was easy - four pleats in front, two darts in back, sew on the facings, and hem the sleeves with a 1/2 inch hem (I topstitched mine).
I tried on the bodice and decided the size I choose - size 8 US/12 UK - was perfect and didn't bother tracing the four skirt pattern pieces. I couldn't stomach it. Not only were there four pieces, but each piece was nearly 48 inches long. My tissue paper would have to be piece together to even begin the tracing. Life is too short.
It all went together in a day. I used french seams on the skirt since your seams tend to show when you walk because of the slit. They weren't hard; it was just a lot of straight sewing.
I held off on hemming until the next day, which was the smart move. At five foot five inches, I don't think of myself as short, but hemming this dress was the most challenging part of the whole shabang. Before I cut out the skirt, I measured the length of a maxi skirt I had made a couple of years ago, and figured I could wack about six inches off the skirt pattern. I have, however, learned to rely on my math at my own peril. So I limited my wacking to only 3 inches when I cut out the skirt. After trying it on repeatedly (I really do need to get a dress form!), I turned the hem up another two and 5/8 inches. I then trimmed the hem allowance to one and 1/4 inches, turned the raw edge towards the hem fold, and then machine stitched down the hem 5/8 inch from the fold.
Before I even finished the dress, I bought some fabric to make the "midi" version - the shorter version whose skirt is about 23 inches long - but after wearing the maxi dress all day, I can't imagine wasting time making the shorter version; the maxi dress is just so fabulous to wear. The long skirt, with the slit, moves in such a wonderful way that feels elegant and lovely. (My photos just don't capture this; Lizzy's photos of her Anna Rose dress does.) This dress is both modern and old fashioned at the same time. Your skirts swish in a most expressive way - you can swish the skirt as you turn a corner, or you can pull your skirt back to show your disgust, which isn't possible with a short skirt, much less pants.
Not to mention how the long skirt makes you look tall and thin!
The best thing that By Hand London did with this pattern was provide the finished garment measurements with their instructions - this is vital in choosing the best size, and something independent pattern makers usually fail to do. The size 8 US/12 UK had finished measurements of 36 bust and 28 1/2 waist - I knew this would work for me.
To say I want to make the v-neck version now is like saying RGIII wants to play football. And I've spotted a nice black-and-white rayon challis print at the local Hancock's I'm waiting for to go on sale. So if you live in Richmond, don't buy it all before I get there, 'kay?
Saturday, August 17, 2013
How To Make a Dress from A Pack of Men's T-Shirts
While my sewing machine was in-hock this week for its bi-annual checkup, I spent a great deal of time thinking about sewing since I couldn't actually sew. I thought back to the first dress I ever sewed - a Simplicity pattern v-neck dress number 9559 in a lavender and white Timeless Treasures quilting cotton (my mother has it now because it ended up a little too big). And then I suddenly realized that it wasn't my first dress.
The first dress I sewed was the spring of my senior year in high school - in 1982 - as a result of seeing an article in a magazine (probably Seventeen since that is what I read at the time) which showed you how to make a dress from a package of three men's t-shirts. The directions looked easy enough that even I could do it. I followed the instructions, using my mother's sewing machine. I was thrilled when it actually worked! Unfortunately, no known photos of this dress survive.
My college roommate and I wore it relentlessly. In summer we wore it with sandals; when it got colder, we wore it with a jean jacket, pearls, and saddle shoes. Our waists were small enough that we used a bandana as a belt. When "Flashdance" was released, I cut off the collar and left the collar edges raw. We rolled up the sleeves. I don't know what happened to the dress after college, and the magazine article is long gone, but I wondered if I could remember how to make it again.
So on Friday evening I was able to spring my Bernina out of maintenance prison and I decided to go to Target and buy a three pack of men's T-shirts:
Things have changed since 1982 - back then your only choice was white Fruit of the Loom. I found you could get black, gray, blue, or a mixture of colors. I went with black and it only cost me $ 12.99.
So here is how you make the dress. Buy a 3 pack of men's shirts - whatever size fits you. I went with a Small. Wash 'em first.
Take one shirt and cut off the hem. I decided I wanted the skirt to begin on my high hip. I tried the shirt on, and marked my high hip with a pin:
The pin mark was 4 1/4 inches from the bottom of the hem, so I cut that amount off the t-shirt. Here's what it looked like after I cut the hem off:
This will become the bodice of your dress. Next take the other two t-shirts and cut the bottom of the shirts off right below the sleeves:
Here's what one of the bottoms looks like after you cut it off:
Do the same thing for the other shirt. These two bottoms will be used to make your skirt. Cut up one side of each of the shirt bottoms. You want to sew the two shirt bottoms together to form your skirt. Basically, you are going from two short tubes to one long tube. Join the two pieces together like so:
Sew your two side seams to form your bigger tube which will be your skirt:
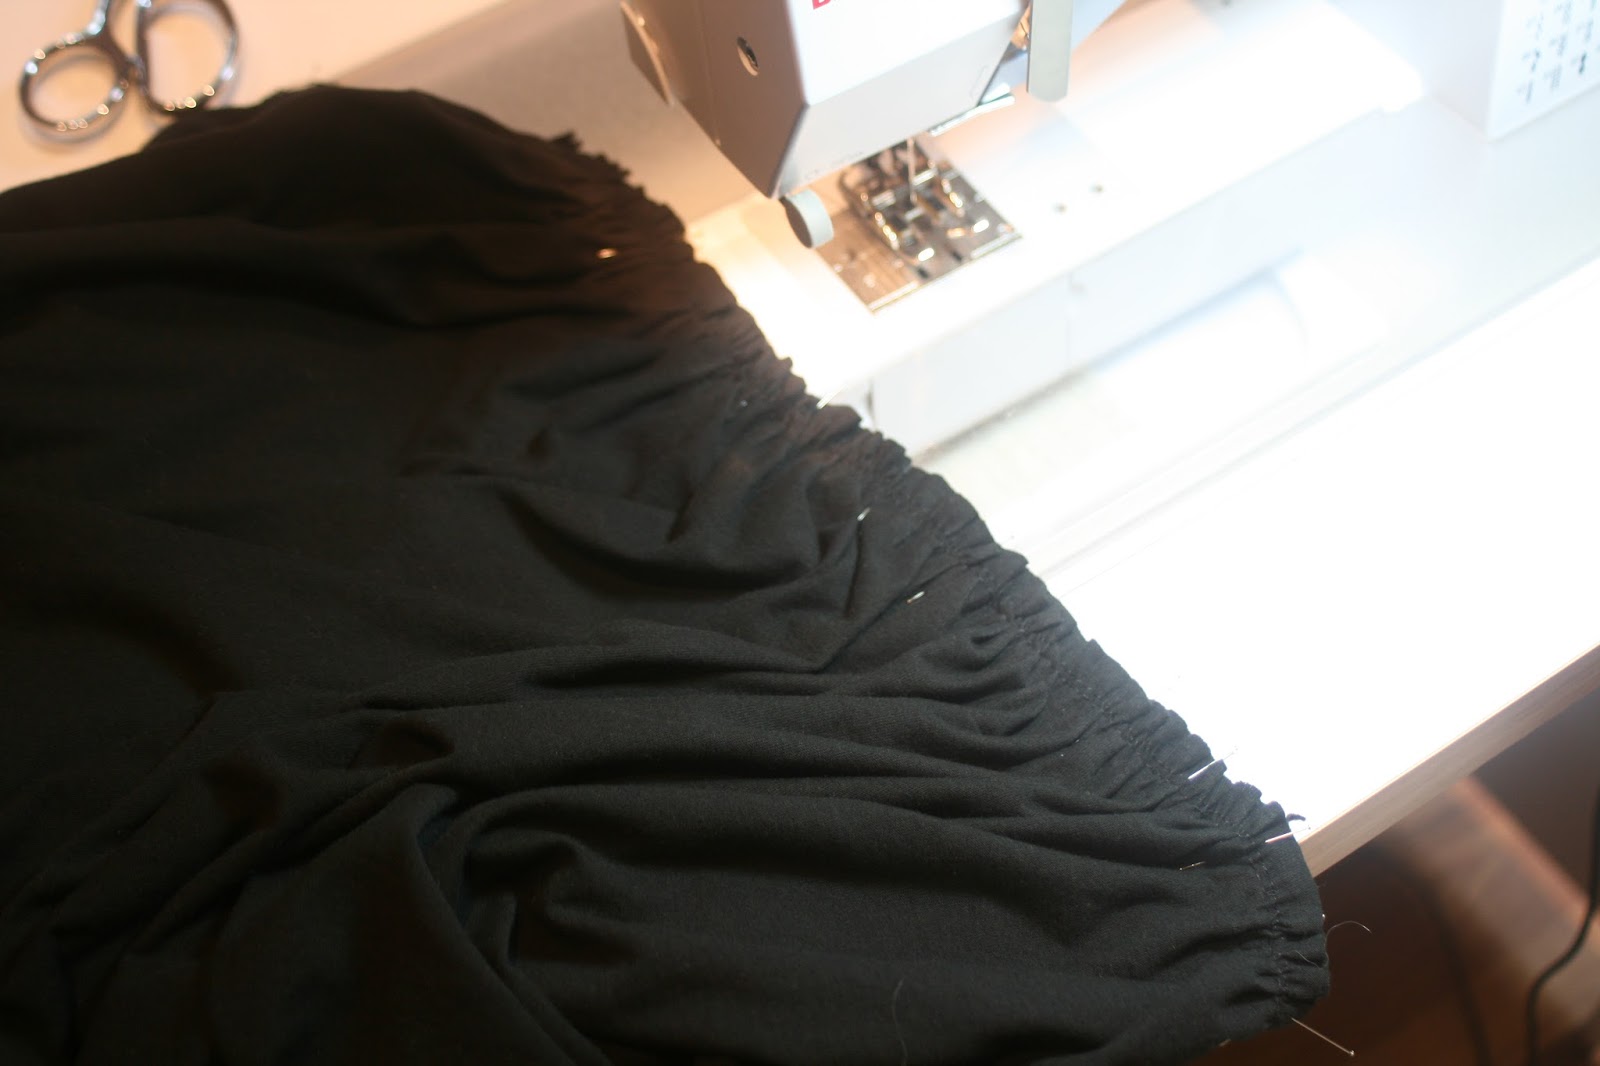
Next, gather this long tube and pin it to your first shirt that you are using as the bodice. I remember the original instructions had you gather it by handsewing; this time I used a long machine stitch (stitch length 5). Once gathered, sew your skirt to your "bodice":
I marked the sides and center front and back on my "bodice" and skirt to assist in adjusting the gathers, but I didn't get too precise about it - this is a $ 12.99 knit dress, after all.
This took less than an hour, even with taking photos. Here it is:
I ended up cutting off the crew neck collar and turning the fabric under by one quarter of an inch and top stitching it down, rather than leaving it raw, Flashdance style. The crew neck just seemed too high and itchy. Of course, the accessory potential for this dress is endless. I tried it on with jeans underneath and it makes a pretty cool tunic, too, which is how I am wearing it now as I type.
Here's a close up of the skirt:
Okay, I'm not as thin as I was in college, but this was fun to make. You could also take a t-shirt you already own, use a 2-pack of men's shirts (Hanes t-shirts seem to come in twos these days) that either matches or contrasts for your skirt. You could also use an old t-shirt you own, and look for an XL or XLL t-shirt at a thrift store to make a longer, but less gathered skirt. Again, the possibilities are endless.
The major advantage of making your dress this way? No hemming!!!!! : )
Sunday, August 11, 2013
A Laura Ashley Sundress - McCalls 4444
As you can see it is "Easy McCalls". I remember thinking while I was sewing it that it didn't seem particularly "easy" to me, but I had only been sewing for a few years. Here's the back:
(Pay no attention to that bit of white around the zipper - that is something some hand sewing will soon fix.) I made this from some raspberry pink and white polka dot quilting cotton which worked for this pattern. I'm not wearing a "foundation garment", to put it delicately, and the two layers of quilting cotton provide plenty of coverage up top - no strapless bra necessary.
I made View A, size 12 straight up, although I shortened those back bands by 7/8 inch (I'm reading from my notes as I type this). Back in 2005, after I finished with each of my patterns, I made a photo copy of the front and taped it to a large manila envelope, and put the pattern pieces, instructions, and pattern envelope inside, along with a scrap of the fabric used. On the outside of the envelope, I wrote notes about alterations, what size I made, and the grade I gave the pattern. On this one, I graded the pattern an "A", and noted "not easy - ended up with good results".
I would probably find this pattern easier to make now that I am eight years down the road in my sewing experience. As a matter of fact, wearing this dress is giving me ideas . . .
Thursday, August 8, 2013
The Lock and Key Dress - Simplicity 6584
The Lock & Key Dress is done! And it took longer than I had planned. (As per usual.) I thought this would be a quick, non-complicated, novelty shirtdress, but I ended up putting in way more time than the dress pattern probably warranted:

I wrote about it here. I finished it last night and wore it to work today. (I find going to work is so much more exciting when I have a new dress to wear.) So here it is:
And here's the back:
These are the changes I made:
1. Decreased the waist seam allowances to 3/8 inch to give me one extra inch in the waist. It fits perfectly now.
2. Seriously shortened the sleeves. I probably shortened them by nearly 6 inches when all is said and done. I originally shortened them by 2 1/4 inches and put the sleeves in but they were miles long and looked like stove pipes. So I shortened them yet another 3 1/2 inches. Here's what they looked like before the final whacking:
These things were so long, they hit my elbow! I estimate that putting in these sleeves and dealing with the length consumed about 2 1/2 to 3 hours of my time . I seriously considered making this dress sleeveless, but I've reached that Certain Age where I can't regard my upper arms with any degree of acceptance.
3. Used fusible interfacing instead of sew-in.
4. Put in machine stitch buttonholes rather than bound buttonholes. I wasn't about to do nine bound buttonholes . . .
5. I made the sleeve "cuffs" like the Hawthorn dress.
6. In addition to the bodice pocket, I put a patch pocket on the right side skirt piece, using the pattern placement on the pattern. It resulted in a pocket 1/2 inch smaller than the pattern called for, but it is the perfect size to store my employee badge:
This pocket is so cool and I enjoyed using it all day. I noticed that Trena added a waist loop for her employee badge on one of her dresses (but now I can't find which one); I might have to start adding a pocket to all my shirtdresses!
How you know this is a vintage pattern:
1. The hem is deeper than modern patterns - 2 1/4 inches.
2. There is nothing sexy about this dress. The bodice is loose and not close fitting, the length of the dress is "correct" for the mid 1960s, i.e. just below the knee, and the buttons go all the way down to hem - heaven forbid there be a flash of leg! Had I been paying attention, I probably would have left off the last one or two buttons.
3. The instructions for this dress fit on one page which seems pretty typical for the era:
This caused me some consternation. I'm used to patterns that have an illustration for each step. I couldn't visualize every step in my mind, so I just took it slow, completing a step, then reading the next sentence, then completing the next step, and so on. If I sewed as I read, the next step became clear. This was the only way I got the collar constructed, as this method/collar was not familiar to me.
4. The front and back skirt side pieces are slightly gathered, which makes altering the dress to fit a lot easier. If you make any change to the tucks in the back bodice or darts in the front bodice, the skirt doesn't need any corresponding changes - you simply adjust your gathers.
Other notes: I actually took the time to hand sew (!) a hook and eye closure at the waist to eliminate any gaping at the waist. I had planned to use gray buttons, but saw these mint green ones, so I got both, and ultimately went with the green. I got the belt at Target, and you can't see them, but my shoes match my belt. This color combination of mint green and coral seem to be the "in" colors this summer. So the dress is vintage, but the colors are up-to-date. : )
Amazingly, for being such a non-sexy dress, I got compliments all day. From people I didn't know. In elevators. I did enjoy wearing it. It was fun, it was comfortable, and I felt "cute". This dress ended being one of those that was a PITA to sew, but a pleasure to wear.
So for the future, I'm going to have to look through my remaining shirtdress patterns, see what else is "on deck", and what I should make next! With the completion of this dress, it was time (past time, really) to take the Bernina to the shop for a tune up; it was starting to skip stitches. When the Bernina person told me it would be 7 to 10 days before my machine would ready for pick-up, I felt myself start to hyperventilate and wonder why I don't own a back up sewing machine after 11 years of sewing. But then I remembered that I neglect housework and my husband for the amount of sewing I do now; the last thing I need is an additional machine to sew even more. I have at least a week's worth of work in putting away patterns, cleaning up fabric, and reorganizing the sewing room. And the ironing, my God, I have so much ironing to do . . .
Happy sewing, y'all.
And here's the back:
These are the changes I made:
1. Decreased the waist seam allowances to 3/8 inch to give me one extra inch in the waist. It fits perfectly now.
2. Seriously shortened the sleeves. I probably shortened them by nearly 6 inches when all is said and done. I originally shortened them by 2 1/4 inches and put the sleeves in but they were miles long and looked like stove pipes. So I shortened them yet another 3 1/2 inches. Here's what they looked like before the final whacking:
These things were so long, they hit my elbow! I estimate that putting in these sleeves and dealing with the length consumed about 2 1/2 to 3 hours of my time . I seriously considered making this dress sleeveless, but I've reached that Certain Age where I can't regard my upper arms with any degree of acceptance.
3. Used fusible interfacing instead of sew-in.
4. Put in machine stitch buttonholes rather than bound buttonholes. I wasn't about to do nine bound buttonholes . . .
5. I made the sleeve "cuffs" like the Hawthorn dress.
6. In addition to the bodice pocket, I put a patch pocket on the right side skirt piece, using the pattern placement on the pattern. It resulted in a pocket 1/2 inch smaller than the pattern called for, but it is the perfect size to store my employee badge:
This pocket is so cool and I enjoyed using it all day. I noticed that Trena added a waist loop for her employee badge on one of her dresses (but now I can't find which one); I might have to start adding a pocket to all my shirtdresses!
How you know this is a vintage pattern:
1. The hem is deeper than modern patterns - 2 1/4 inches.
2. There is nothing sexy about this dress. The bodice is loose and not close fitting, the length of the dress is "correct" for the mid 1960s, i.e. just below the knee, and the buttons go all the way down to hem - heaven forbid there be a flash of leg! Had I been paying attention, I probably would have left off the last one or two buttons.
3. The instructions for this dress fit on one page which seems pretty typical for the era:
This caused me some consternation. I'm used to patterns that have an illustration for each step. I couldn't visualize every step in my mind, so I just took it slow, completing a step, then reading the next sentence, then completing the next step, and so on. If I sewed as I read, the next step became clear. This was the only way I got the collar constructed, as this method/collar was not familiar to me.
4. The front and back skirt side pieces are slightly gathered, which makes altering the dress to fit a lot easier. If you make any change to the tucks in the back bodice or darts in the front bodice, the skirt doesn't need any corresponding changes - you simply adjust your gathers.
Other notes: I actually took the time to hand sew (!) a hook and eye closure at the waist to eliminate any gaping at the waist. I had planned to use gray buttons, but saw these mint green ones, so I got both, and ultimately went with the green. I got the belt at Target, and you can't see them, but my shoes match my belt. This color combination of mint green and coral seem to be the "in" colors this summer. So the dress is vintage, but the colors are up-to-date. : )
Amazingly, for being such a non-sexy dress, I got compliments all day. From people I didn't know. In elevators. I did enjoy wearing it. It was fun, it was comfortable, and I felt "cute". This dress ended being one of those that was a PITA to sew, but a pleasure to wear.
So for the future, I'm going to have to look through my remaining shirtdress patterns, see what else is "on deck", and what I should make next! With the completion of this dress, it was time (past time, really) to take the Bernina to the shop for a tune up; it was starting to skip stitches. When the Bernina person told me it would be 7 to 10 days before my machine would ready for pick-up, I felt myself start to hyperventilate and wonder why I don't own a back up sewing machine after 11 years of sewing. But then I remembered that I neglect housework and my husband for the amount of sewing I do now; the last thing I need is an additional machine to sew even more. I have at least a week's worth of work in putting away patterns, cleaning up fabric, and reorganizing the sewing room. And the ironing, my God, I have so much ironing to do . . .
Happy sewing, y'all.
Subscribe to:
Posts (Atom)