This is the third jeans skirt I've made since I started sewing and I have used the same instructions each time, which are the BEST and easiest instructions I have found on the internet. The instructions are from savyseams.com and they are found here. Go ahead a look at them. Go on - I'll wait for you to get back.
I guarantee you that if you can operate a sewing machine, you can do this. I'm posting how I did it using savyseam.com's instructions because I have a few tips to add. First, I used the two panel method, rather than the four panel. That is, I added fabric at the front and the back, but not on the sides. This mades the skirt a little more straight, and less flare-y.
OK, start with a pair of jeans and cut the legs off. I cut my legs off 19 inches from the bottom. The way to get the most accurate cut is to measure from the hem up:
 Next, cut off the inseam in accordance with the instructions. This is one of the reasons I really like the method from savyseams.com. You aren't fiddling with a seam ripper to undo the seam, you just cut it off:
 Next, draw a line from about 2 inches below the back yoke to the bottom of the leg, like so:
 And cut like so:
 Do this on the front as well, about 2 inches from the end of the zipper. See the instructions at savyseams.com:
 Refer to the instructions to release the front and back center seams, and then iron the raw edges of the former inseam under about a half an inch:
 Use the fabric from the legs you cut off to fill in the triangle areas in the front and back of the skirt, and then pin. I do one side at a time. This is the back:
 First, edgestitch along your folded edge, then stitch again about a quarter of an inch from the edgestitching. It will look like this:
 One thing I have discovered is that thread made specifically for jeans doesn't work so well. I just use regular thread in a color that matches close enough. Works well.
This is what the inside will look like. After you do your stitching, cut away the excess on the inside of the skirt:
 Do this, of course, for the front and the back. Now you just have to hem it. The way I hem it is to lay the jeans skirt flat and measure down from the waist. I marked my hem 21 inches from the top:

When you lay your skirt flat, make sure the front waist naturally falls lower than the back waist. This will make you hem a lot more even:
 After marking, cut the front and the back to length at the same time:
 All trimmed up:
 Next, I like to run a machine stitch around the bottom about 1/2 inch from the edge of the skirt:
 Then I like to throw the skirt in the washer and dryer and let the bottom hem just naturally fray. Unfortunately, that didn't work on this skirt. I think it is because of the spandex in the fabric. After washing and drying it, my hem just looked like this on the right in this photo:
 On the left you can see a previous skirt I made where it frayed quite nicely. Not so the evil spandex jeans - I just got strings hanging down where the fraying should be. So I used my newly-trusted serger and finished the bottom edge. I guess I could have just left it like that if I was going for the deconstructed look. But for me, "deconstructed" is the same as "too lazy to construct", so I turned up the hem just past the line of 1/2 inch stitching, pressed it, and then top stitched the hem. It ended up looking like this which is much neater:
 Here is my finished skirt:
 Still a bit snug, but much better! I can see wearing this with a sweater and some boots come fall.
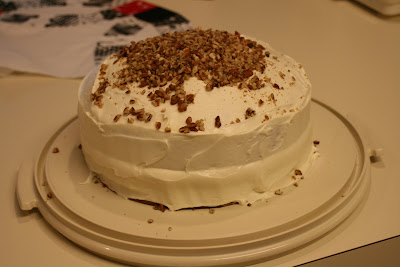
  So to celebrate, I had to cook! I made my first red velvet cake in the new cake pans my mother gave me. It was yummy, and I even let other people have some!
 Do this, of course, for the front and the back. Now you just have to hem it. The way I hem it is to lay the jeans skirt flat and measure down from the waist. I marked my hem 21 inches from the top:
When you lay your skirt flat, make sure the front waist naturally falls lower than the back waist. This will make you hem a lot more even:
 After marking, cut the front and the back to length at the same time:
 All trimmed up:
 Next, I like to run a machine stitch around the bottom about 1/2 inch from the edge of the skirt:
 Then I like to throw the skirt in the washer and dryer and let the bottom hem just naturally fray. Unfortunately, that didn't work on this skirt. I think it is because of the spandex in the fabric. After washing and drying it, my hem just looked like this on the right in this photo:
 On the left you can see a previous skirt I made where it frayed quite nicely. Not so the evil spandex jeans - I just got strings hanging down where the fraying should be. So I used my newly-trusted serger and finished the bottom edge. I guess I could have just left it like that if I was going for the deconstructed look. But for me, "deconstructed" is the same as "too lazy to construct", so I turned up the hem just past the line of 1/2 inch stitching, pressed it, and then top stitched the hem. It ended up looking like this which is much neater:
 Here is my finished skirt:
 Still a bit snug, but much better! I can see wearing this with a sweater and some boots come fall.
 I would say that this skirt took me about an hour and ten minutes to make, not counting the extra hemming I had to do. If you just did your hem like I intended and let it fray, the whole thing shouldn't take you very long at all. Anyway, I love those instructions - check it out!
Parting Shots: I got an apron! My LQS was having a sale on shop samples, and I spied this and grabbed it. I love it for two reasons: the adorable rick rack, and the fact that VickiW made it! It had to come home with me so as to not risk it going home with someone who wouldn't value it:
 So to celebrate, I had to cook! I made my first red velvet cake in the new cake pans my mother gave me. It was yummy, and I even let other people have some!
2 comments:
I'll just bring you the other apron that I made as a sample for that class. God knows, I'll never use it! I prefer my pants leg as an apron.
What a great idea! Although I would prefer a long skirt because I haven't got the such nice legs as you :-)
Post a Comment