Having procrastinated as long as I possibly could on the new coat, I faced facts: I was going to have begin. First step: pre-shrink my camelhair fabric that was not inexpensive. Shrinking your wool before you sew it into a garment is way smarter than shrinking afterwards. Gertie speaks of the dryer method, which involves putting your beloved fabric in a hot dryer with a wet towel and letting it tumble for a long while. I have never tried this method, and frankly I am suspicious of it. It sounds like an excellent way to felt your wool, if you are going for that. I am not, so I was leary of putting my not-cheap fabric in a dryer and giving it a spin. Usually, I pre-shrink my wool by pressing it with with plenty of steam on my trusty old ironing board. But those prior projects involved wool skirts or dresses, not 6 1/2 yards of 60 inch wide fabric. That's a whole lot of fabric to press on a twelve inch wide ironing board.
So I took it to my local cleaners and ask the young guy manning the counter to steam press it, but not clean it. "You know, like a tablecloth." He nodded, and seemed to get it, so I left my precious fabric with him, and picked it back up five days later, neatly pressed and hanging on a hanger. They only charged me $ 7.49, so it was a major step forward for the great coat sew-along. : )
Second step: cutting out. The dreaded cutting out stage- arrgghhh! My first decision was whether to begin by cutting the garment fabric, the lining fabric, or the interfacing. One thing I noticed about the skirt portion of the pattern was that the lining was to be cut several inches shorter than the garment skirt. Normally, I just fold the extra length up and out of the way when cutting out the lining of skirt so as to not cut the skirt pattern pieces, but this skirt is a circle skirt - folding it up isn't practical. So I considered tracing the skirt pieces to specifically make the skirt lining pattern pieces, but this skirt consists of four different pattern pieces. I have neither the time nor the energy for that.
So I decided the garment pieces would be cut first, and the lining later, and I would actually cut the skirt pattern pieces shorter while cutting out the lining. This caused me a bit of distress because I like to have a pattern intact in case I ever use it again. But to alievate my concern and give myself permission to cut those skirt pieces shorter when I cut out the lining, I made a deal with myself that when the Butterick patterns go on sale again, I'll buy another Butterick 5824, so I'll have an intact pattern should I ever decide, however unlikely, to make this coat again.
THAT issue finally resolved, I decided to start by cutting out the interfacing first. Mostly because of laziness. The pattern only requires two pattern pieces, number 11 and 8, to be cut from interfacing. Plus, it makes more sense to me to cut the fusible interfacing first, fuse it to the garment fabric, and then cut out the pattern piece. In essence your interfaced piece becomes your pattern. This ensures that your interfacing and garment fabric perfectly match in shape and size. It makes no sense to me to cut your garment fabric, then cut the interfacing piece, and then try to match the two up when you fuse the two together.
Pattern piece number 11 is the skirt front facing. It is a rectangle, so rather than use the tissue pattern to cut it out, I just pulled out the rotary cutter and cut a rectangle of interfacing 6 7/8 inches wide by 29 inches long. Then I put the pattern piece on top of my interfacing and made my markings. That piece is on the far left:
In the middle is pattern piece number 8 which is the upper collar and front facing. The piece on the right is an optional step that Gertie offered here. The purpose of this extra interfacing is to support the undercollar. Because I was the kid that always did the extra credit homework at school, I knew I had to do this completely optional step. Plus, my camelhair wool really is pretty lightweight, so the extra support is probably warranted.
To cut this piece out, you have to draft your own pattern piece which follows the roll line of your collar. I followed Gertie's instructions, going so far as to move my laptop to my cutting table so I could refer to it step by step. I had to look at the photos several times, but I think I managed to draft the pattern successfully, and then I cut out my two fusible pieces as directed.
As this point, the only interfacing left to cut was 3 inch bias strips to be used on the coat's hem. I thought about going ahead and cutting these bias strips since I had the rotary cutter and mat out and ready to go, but I decided against it. I wasn't sure how many bias strips to cut (the pattern doesn't give the skirt's circumference) and I was pretty sure that if I went ahead and cut these bias strips now, I wouldn't be able to find them when it came time to actually apply them to the skirt. So I'll wait on that step.
Whew. That's enough for now. And all I managed was cutting three pattern pieces of interfacing. See why this is going to take me six months to make this coat???? : )
Friday, April 19, 2013
Wednesday, April 17, 2013
I'm Really, REALLY Late To This Party
I'm just a hem away from finishing Vogue 8648, but I wanted to blog about joining Gertie's 1950's Coat Sew-Along. Here's the pattern, Butterick 5824:
I love my Pendleton winter coat, but it just got me through my third or fourth winter and it is starting to look a bit worse for wear, so I'm all excited about sewing my first coat, despite the fact that it is Spring, not Fall, and Gertie ended her Sew-Along like, six months ago. I am not to be deterred. This is all part of my master plan. No, really.
Ok, the actual story is that I found out about Gertie's Sew Along when she announced it, but I knew there was no way I would actually be able to choose my fabric and gather my supplies in time to begin with everyone else. I am a ditherer. I knew it would take me months to select just the fabric I wanted, and I didn't want to feel like I was choosing and sewing with a deadline breathing down my neck - that's too much like work. So in my mind, I gave myself six months to get it together, thus giving myself another six months to actually sew the coat - plenty of time before next winter. I must say, I don't know how to make sewing a coat any less stressful than that.
And dither I did. First, I waited for a $ 1.99 sale of Butterick patterns at my local Hancocks to obtain said pattern. Then I went to work looking for the exact right fabric. In my mind, I wanted something, I don't know, red, maybe. With cashmere in it. That was the dream. In the end I went for this from Gorgeous Fabrics. It is not red, but a green so dark it looks black. But I didn't buy it for the color, I bought it for fabric content. It is made of camelhair. Did you know that camelhair fabric is made from, you know, actual camel hair? I did not. I thought the term referred to the color, since most camelhair jackets men wear are a camel tan color. But I learned that camelhair is made from the wool on the underbelly of the camel which is very warm and very soft. And this particular camelhair is very light and drapy, something I felt was perfect for this coat design which has a whole lot of circular skirt to it. Stiff and heavy is not what this pattern needs. I was particularly interested in a wool that was VERY warm; if I am going to all the trouble to sew a coat, I want it to be worth my time - this coat needs to be the warmest garment ever fashioned . . .
Then of course, I had to wait for it to go on sale. I bought my lining at the same time, same place, also on sale, here. It's a seafoam green and a drapey rayon, so it should get the job done.
Finally, there was the interfacing. Gertie recommended this Pro-Weft medium-weight fusible interfacing from Fashion Sewing Supply and it arrived this week. So I am officially out of excuses. The coat must be begun. I only have six months until cold weather shows up again.
I am very intimated by this project, so again, I'm going easy on myself and giving myself six months to get 'er done. All of Gertie's posts for this project are here. From reading the pattern instructions and Gertie's posted instructions, I think my two biggest challenges are going to be 1) cutting out; and 2) the bound buttonholes. Cutting out involves the camelhair fabric (all 6 1/2 yards worth of 60 inch fabric) and the lining, and the interfacing. Setting aside the fact that I am a slow-cutter-outer, the layout of the pattern pieces involves cutting one layer at a time - which is a huge PITA.
And my experience with bound buttonholes consists of trying a practice buttonhole once, like nine years ago and saying, "nah", and proceeding to make stitched buttonholes instead. But I think this fabric and project deserve bound buttonholes, and blessedly, there are only two. I'll give it a go.
Because this is a big project for me, I'll be working at it a little at a time, with other projects in between. This is unusual for me; I prefer to work on one project at a time, completely finishing and putting everything away before starting the next garment. This gives me a sense of accomplishment and order. Well, what little order I can manage in a sewing room with no order whatsoever.
My plan is to blog about my progress and my thought process on how I approach a project like this (since I absolutely did not have time to do the blogging I would have liked on my wedding dress), but I predict what my blogging will really reveal is how neurotic I am. Won't this be fun??? : )
Tuesday, April 2, 2013
Butterick 5846 - The Forties Shirtdress
It's a 1940's shirtdress! It's no suprise that I love shirtdresses (Crab Dress anyone?), and Butterick came out with this pattern that I bought in December for 99 cents or $ 1.99, I don't remember. I was in Cotton Creek when I bought it and my mother pronounced the pattern art "ugly". I can't really argue with her about that:
What is worse is the photo on the Butterick website which shows the dress made up in a cheap rayon of the most unbecoming color. (I won't link to it here to save your eyes, not to mention your sensibilities.) But I assured Mother that I would make it look better than the line art. As I have said before, I love me a shirtdress! They are just so comfortable, yet put together:
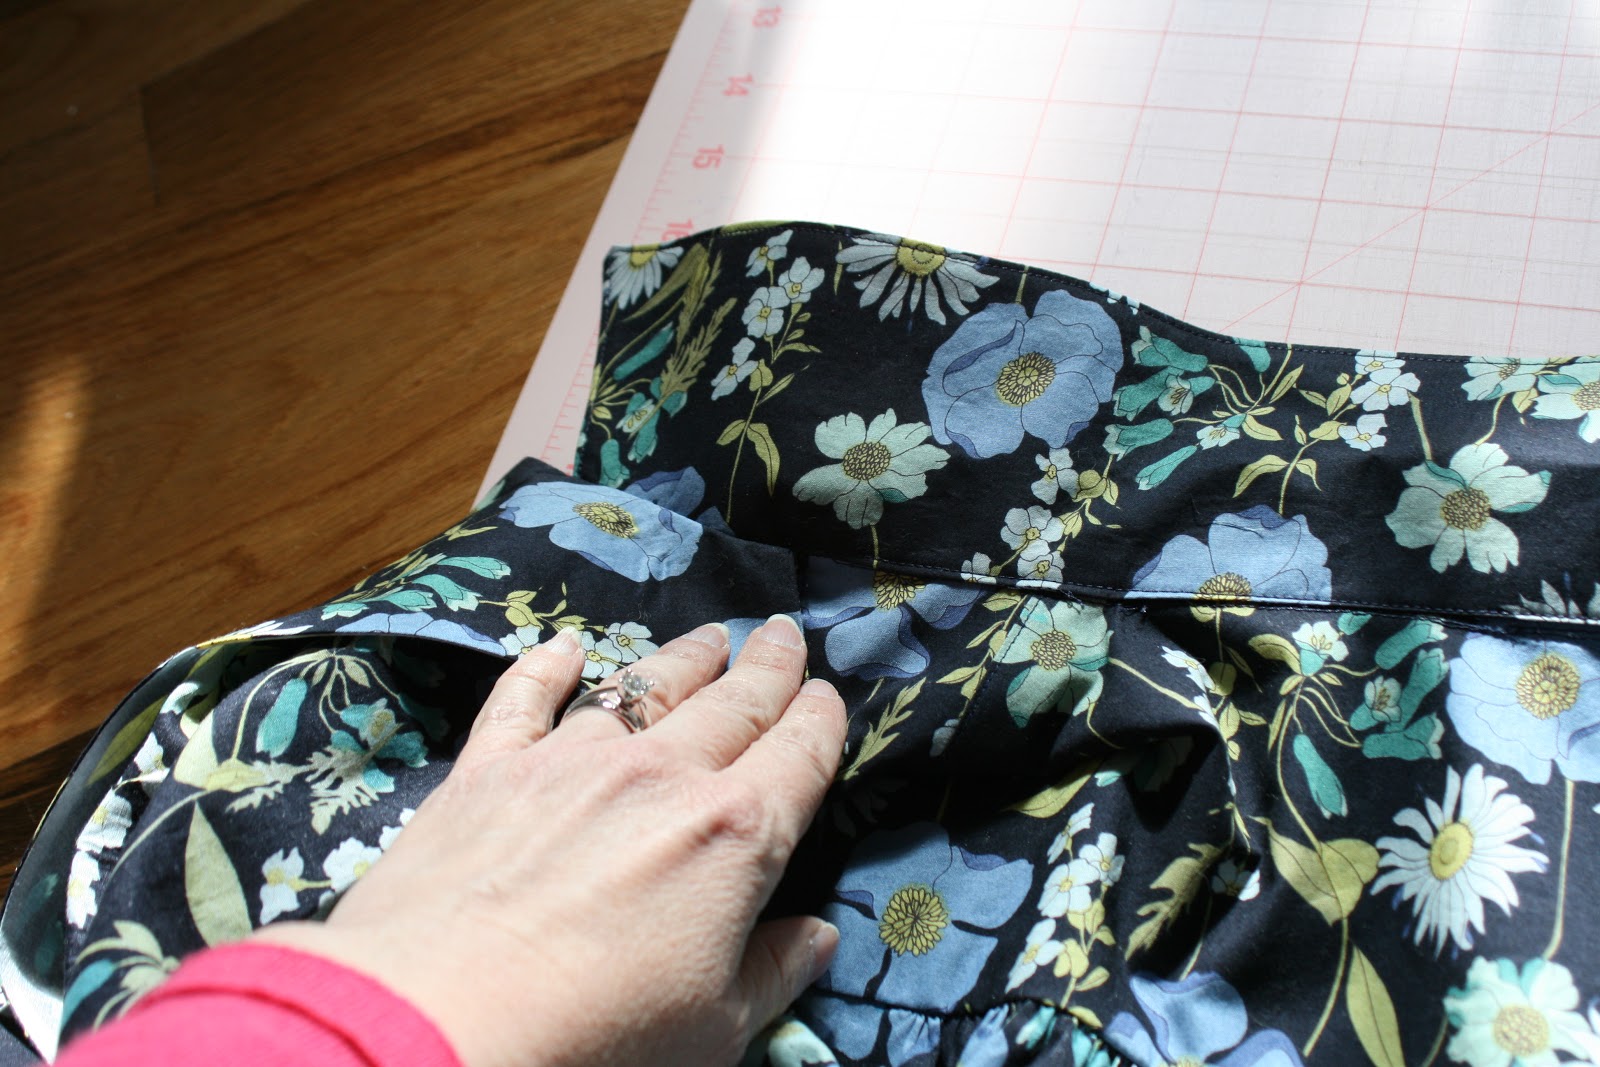
I used a cotton lawn I bought at my LQS probably 18 months to 2 years ago. I want to say it is a Kaufman fabric. It was a pleasure to sew and I think it lent the right mood to this design. The bust is fashioned by gathers at the yoke and pleats at the waist. Unfortunately, the back of the dress is fashioned in the same way, so I suppose you could wear it backward if you wanted to:
The design makes the back blousen more than I would like, but it ended up not being as bad I thought it would. I really liked the waist pleats which were sewn, then top stitched:
And I realized while I was making this dress that this is the first gathered sleeve I have ever done (on purpose!):
Wow. What a relief not to have to wory about errant gathers while sewing in a sleeve. It was a lot of fun. I did notice one mistake in the instructions. The marks on the collar pattern piece for where you clip to are put in the wrong place. The illustration even shows the mistake:
You can see where you are to clip doesn't match up with the front facing. If you do it the way the pattern piece and instructions tell you, you will have nowhere to put that collar seam allowance - it either has to go under the front facing or under the clipped top collar. I figured it out before I sewed everything down and was able to make my collar and my facing match up:
I was pretty pleased that my sewing experience allowed me to figure this out before I blindly followed the instructions! The other change that I made was to add to the hem to make the skirt a little longer. I had already cut the skirt out before I figured that the skirt was too short. So I added a bias band to the lower edge of the skirt. I simply cut a three inch bias strips from my fabric and sewed them together. Then I folded the three inch bias strip in half and sewed it to the hem of my dress with a 1/4 inch seam allowance. I pressed the seam allowance towards the skirt and then edge stitched it. I'm sorry I didn't get a photo of the hem. It's a nice finish, and I stole it from Kay Whitt's patterns. I felt like the design of this dress required a longer skirt. The bodice is so full with the gathers in the bodice and the sleeves, I think the skirt has to be longer to balance out the top. Even with lengthening the skirt by an inch or so, I still think it needs to be lengthened by another 2 inchs so that it covers my knee. If I was going to make it again, I would make this adjustment, but I don't think I will make this pattern again because of 1) my no repeats rule these days, and 2) there are just so many great shirtdress patterns out there. So many shirtdresses, so little time!
Here is a shot of the buttons the Carpenter helped me pick out. The obvious choice would have been navy, but that was a little to ready to wear. We went with a seafoam green that picked up the green in the fabric:
Other than the hem, I made no other alterations and made a size 12 straight up. It was funny, while I was making this dress I idly thought to myself, "I wonder what I should make as my Easter dress?" And finally I looked down and realized I was making my Easter dress. I wore it Sunday morning with a Laura Ashley hat trimmed in a navy ribbon that I bought at least 20 years ago, maybe more. I love wearing a hat on Easter - very retro and the old men the congregation love it! They tell me so every year. : )
Thursday, February 14, 2013
Happy Valentine's Day! New Look 6000
Last night all I had to do was sew the buttons on this dress and I'd have the perfect red Valentines Day Dress. This is a New Look pattern I saw in a Walmart in December and bought on the spot:
And I knew exactly the fabric I wanted for it. The same fabric I made my Laura Ashley Dress from Hancock's, but in a solid red color. It took me awhile to get this one done just due to work/wife commitments. The pleats on the left side drew me to the pattern right away.
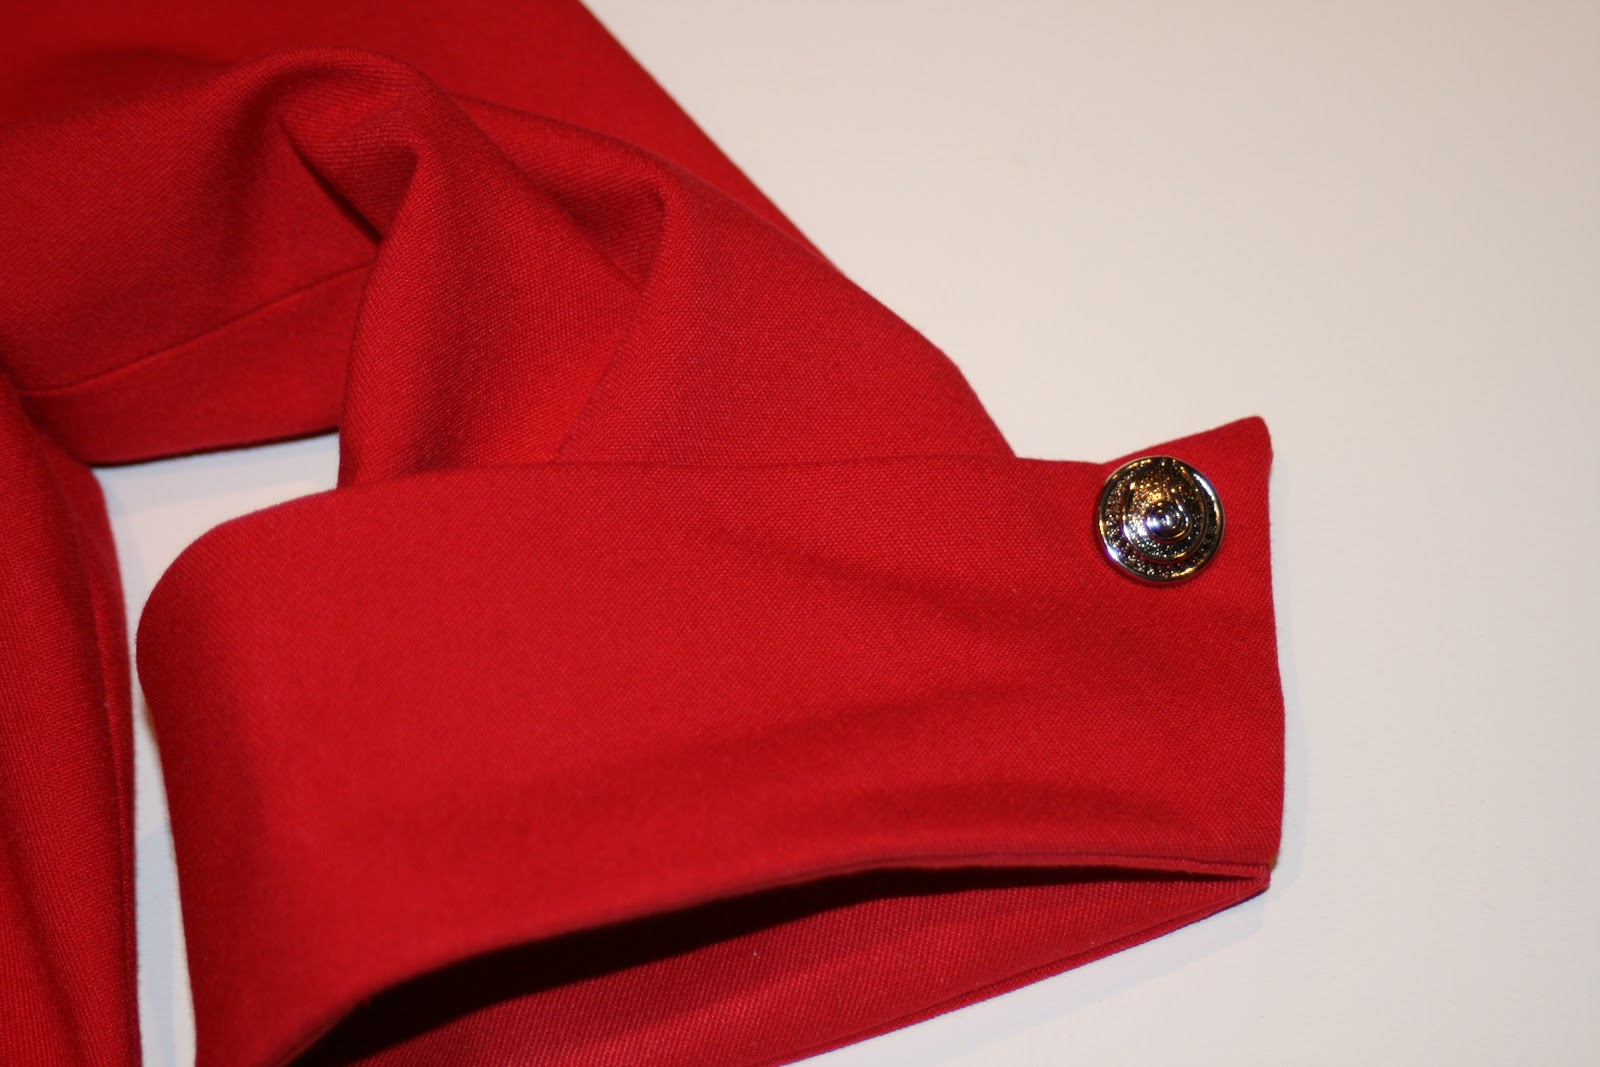
They were easy to do and have great impact. The pattern required a one inch button at the collar and four 5/8 inch buttons for the sleeves. I found them at the expensive fabric store in town:
The other aspect of the pattern that I love is the sleeves. I used to hate putting in sleeves, and I still am not a great fan, but I find myself looking at dress patterns with sleeves. Without them, I'm too cold at work, even in the summer. Well, especially in the summer, given the HVAC overkill in our country. That means I have to wear sweaters with my sleeveless dresses, both summer and winter. And that sort of defeats the purpose of making your own clothes. I don't want to cover up all my hard work with a sweater!
The sleeves actually went in really well. So maybe I'm getting better at them after only 11 years of sewing!
My usual photographer is on a cruise (!), so these photos were taken later in the day, and you can see some of the wrinkles, but I still enjoyed wearing this dress.
It's sort of mod-Mad-men; vintage-like, but without the vintage pattern. I made size 12 and sewed it straight up, with no alterations, other than making the hem one inch, rather than 1 1/4 inches, just to have a little extra length.
This pattern reminded me why I like the "Big Four" patterns.
1) The finished garment measurements are printed on the pattern (independent pattern makers please take note);
2) I know what size works for me and what the usual ease is on these patterns, so no muslins;
3) They are cheap, especially during a $ 1.99 sale (or less), so no tracing for me - if another size is necessary, I just buy another pattern (my time is worth more than the $ 1.99!).
The dress is Carpenter-approved, and he told me that my dress looked "just like the pattern picture". He's kind and I love him.
Parting Shot: Flowers for Valentines. I know they are cliche, but I love flowers this time of year. I'm tired of winter and we are months away from seeing flowers in the yard yet, so they are a welcome sight:
Monday, December 3, 2012
A New Laura Ashley!
I was really taken with McCalls 5972 - a Laura Ashley sheath dress with a retro collar:
I made view "B", with a plaid that looks like a wool, but is really a synthetic blend I found at Hancock's. It was perfect for this pattern: soft drape for the collar, but enough body for the dress. I don't know what possessed me to choose a plaid for my first rendition of this dress - all that extra matching at the center of the dress, and the skirt sides took more way more time, but I just liked the look of this plaid. The collar rolled perfectly, and this synthetic was more of a pleasure to work with than I had anticipated. I made a size 12 with no alterations, except for the side seams which I varied based on the finished pattern measurements. I sewed the side seams with a 5/8 inch seam allowance above the bust darts, and then narrowed the side seams to 1/2 inch to the waist. I made the skirt with 1/2 inch side seams and got a very good fit.
(This fabric really is wrinkle resistant - I had been sitting all day at work when this photo was taken.) My only other change was that I used silk shantung bias strips to finish the armholes, rather than single fold bias tape the pattern called for. There is a side seam zipper and a back vent. The bodice is lined, and I used some light pink cotton batiste I had leftover in the stash.
All and all, this turned out to be a very comfortable and professional dress and I recommend the pattern.
Parting Shots: My wedding present from VickiW!
Vicki quilted feathers in the blocks and cross-hatching in between! And here is the all-important label:
This quilt means so much to me. I love the colors. I love the quilting. And it is big! The Carpenter said it was "too good to use" but we have been sleeping under it every night! Thank you, Vicki!
Sunday, November 25, 2012
A Christmas Party Dress - Early!
I went on a Sewing Retreat the weekend of November 11th, but haven't been blogging because my computer wouldn't turn on. At all. And I'm not talking about the blue screen of death, I'm talking about the black pit of darkness that was my lap top screen. I finally submitted to the ultimate fix - I took my lap top to work. I don't know why this works, but as soon as I got it to the office and pushed the power button, it fired right up. I guess my lap top just likes to get out of the house from time to time. It's evil that way.
I really don't need to go on a Sewing Retreat to sew - The Carpenter lets me sew any time I want to, but my friend Maria really wanted to go, and Maria is like so many quilters - to really sew all weekend, she has to run away from home and let her family fend for herself. Maria is a new sewer (which I like to believe I somehow helped inspire), so I joined her at a 4-H camp about an hour and half from home. It was very productive and I met wonderful women, all quilters. I was the only garment sewer. I decided to spend the weekend making my dress for my company's annual Christmas party, which was renamed the Holiday party, for political correctness. I still call it the Christmas party because if it wasn't for Christmas, we wouldn't been having it.
I normally make my dress every year but I never blog about it because it is the busiest time of the year, plus my dress is usually not my best work - I cut major corners sewing it. Mostly because I don't have a lot of time. And I am fine with that because the dress is going to be worn once, maybe twice, three times tops. I don't worry about finishing seams or any imperfections. The party is large, dark, and most everyone there is at least slightly tipsy. No one is noticing whether my hem is perfect.
But this year I set aside an entire weekend in November to focus on the dress. I like to make my Christmas dresses with circle skirts so I can wear a big crinoline underneath because if it ain't poofy, it ain't a party.
I was inspired by this book by Mary Adams that I bought this past summer when I wasn't sewing but I was reading about sewing:
I love the white/dark blue combination; it looks very classy and chic. The book comes with patterns for three dress variations, so I used her circle skirt pattern which I traced. For the bodice, I decided to go with the Kwik Sew pattern 3760 I love so much:
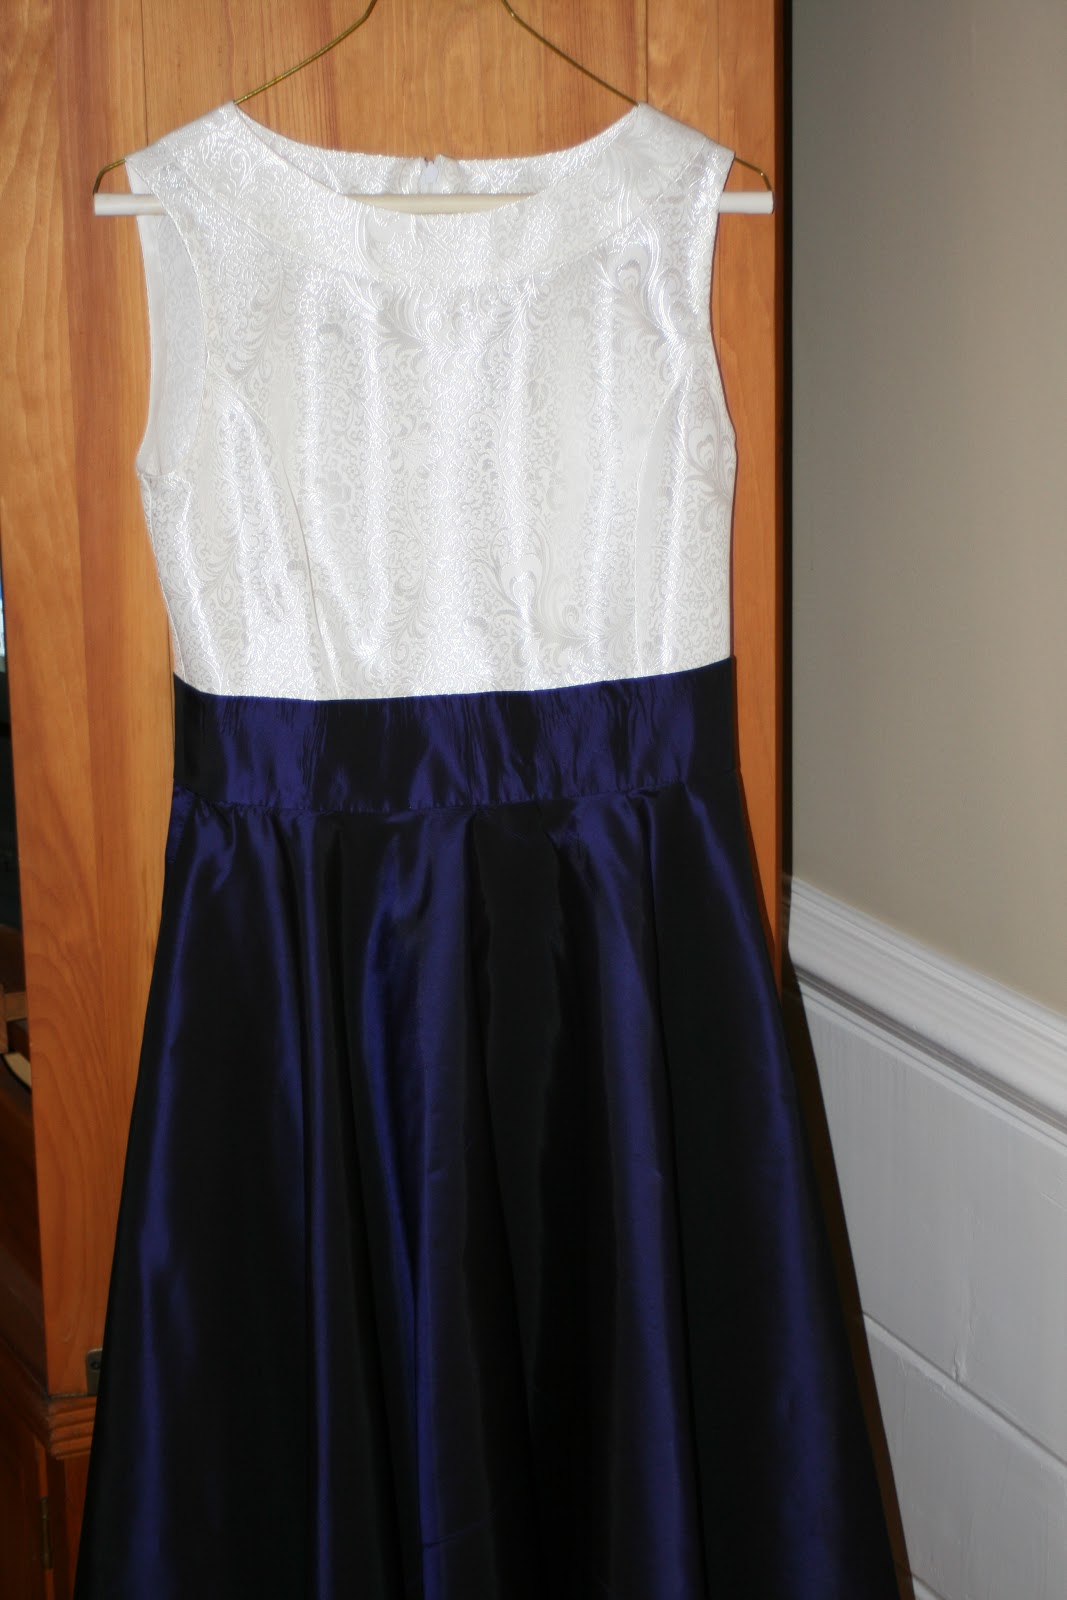
The pattern has the waistband that I added to the circle skirt, and I knew the bodice would fit me well. I made the skirt and waistband from some royal blue/violet taffeta someone in my sewing guild gave me several years ago. I don't know the fabic content (although I am pretty certain it isn't silk), but it is stiff and rustles like taffeta. For the bodice I dithered for weeks about what to use. I thought that silk shantung would be too sheer (something I learned while sewing my wedding dress), and I didn't want to try to wrangle something like silk charmuse for this dress. I finally went with a man made fabric I found at Joannes that shimmered a little, even though I usually hate working with synthetics. The Joannes fabric ended up being very easy to work with, although it raveled like crazy. By the end of the retreat, I had a completed dress that only lacked a hem:
Sorry about the poor quality photos - the lighting wasn't great. But you get the gist. Here are some photos that show the fabrics a little better:
I ended up binding the armholes with silk shantung bias strips (silk was leftover from the wedding dress project):
I have found that silk shantung is awesome for binding armholes. It is thin, presses well, and is very strong, but flexible. I cut my bias strips 2 inches wide, then folded them in half, wrong sides together, and then I sewed them to the armholes using a 5/8 inch seam. I then trimmed the seam allowances to 1/4 inch, and pressed the bias strip to the inside of the bodice. Because I had the time, I hand sewed the binding to the bodice.
So I took more time with this Christmas dress than I usually do - I finished the seam allowances. When I have the time, I can't NOT do it. : )
Once I got home, I hemmed it. The taffeta is very stiff, and because I had such success with the silk shantung in binding the armholes, I decided to use the same process to hem the circle skirt as well. I used hot pink silk because I had more of it (and the hem of that skirt is yards and yards long). After I got the pink silk on the skirt, I liked the way it looked, so instead of pressing it up into the skirt, I just pressed it down so it shows. So now I have a thin strip of hot pink at the bottom of the skirt and it made me so happy I had to dance around in my dress. I love it when that happens - it is one of those happy accidents that makes my design better.
I'll post a good photo of me in the dress taken at the party, which is on December 8th. But next up: I'm working on McCalls 5972.
Wednesday, November 7, 2012
The Ashland Dress
I loved the Schoolhouse Tunic so much, I made Sew Liberated's Ashland Dress as well! Here's a photo of the bodice:
And here's the pattern photo:
I ended up buying the kit for the dress from Sew Liberated's website, along with the pattern because it saved me from having to choose the fabric for this project. I know, choosing the fabric is the most fun part, right? I agree, but in addition to trying brand new patterns, I'm trying to break out of my rut and try new kinds of fabrics that I wouldn't ordinarily try. The fabric in this kit was a cotton chambray with some lycra in it - something I have never, in the past ten years of sewing, ever used. I'm somewhat of a natural fabric snob, so sewing with stretch fabrics hasn't appealed to me. So this was my opportunity to give it a try.
I've also discovered that I am a ditherer - I could spent months trying to figure out which fabric I wanted to use to make this dress. Frankly, I wanted to just get on with it, and I figured that if Sew Liberated was selling this particular fabric for this pattern, it had a likely chance of success. We all know that matching up the right kind of fabric with the proper body and drape is the key to successful sewing.
The kit came with four yards of the fabric, a navy invisible zipper, and some interfacing. I was first puzzled by the color of the zipper, as I thought the fabric was grey:
But it turns out that the fabric is made of navy and white threads, rather than black and white. I was concerned that the color and dress style would look a little too pilgrimy, but then I decided it was a pilgrim time of year, so I went with it. The fabric ended up being a pleasure to sew. Yay!
I also discovered that the interfacing included in the kit isn't enough for this dress, so I used my stash interfacing and I used the kit interfacing for my practice buttonholes. Interestingly, there were no buttons included in the kit, but much to my suprise and elation I found five one-half inch navy buttons in my stash - and the chances of that happening is right up there with winning the lottery or losing weight on a cruise.
Let me say upfront that I really like this pattern and this dress. But despite my efforts to move this project along by ordering pre-selected fabric, it still took me over two weeks to make the dress. The first hurdle was tracing the pattern. This took significant time and trouble. Normally, I'm not a tracer kind of gal, but the pattern cost $ 15, and it came with different bodice pattern pieces depending on whether you were an A cup, B cup, C cup, etc. I had no idea as I wasn't completely sure whether I should make a size 6 or 8, or what cup size I should go for, so tracing made sense in case I was wrong. But with so many sizes, the tracing was confusing. Here is a dart in one of the skirt pattern pieces:
The Carpenter remarked that it resembled an electrical diagram on construction plans, and he was glad it was me and not him who had to sort it all out. There was at least one pattern piece where I traced the wrong pattern size, but I figured it out before the mistake was irrevocable.
Of course, after tracing, I had to cut out the traced pattern pieces. Then I had to cut out the pieces in the fabric. (I'm apparently a slow cutter-outer.) I ended up tracing a size 8, with a C cup. I don't normally think of myself as a C up, but the finished measurements of 37 1/2 inches was the same as the Kwik Sew pattern I liked so much.
The second reason this dress took so long was because there were a lot of pattern pieces to it. I ended up cutting out enough pattern pieces to complete a step or two in the directions, and then going back to cut out some more. I eliminated the in-seam pockets and the waist ties, mostly because I didn't want to bother tracing and cutting them out. The other reasons are that I generally avoid in-seam pockets as my hips don't need extra fabric around them, thank you very much, and I thought the waist ties were unnecessary and this fabric seemed a little heavy for them.
The third reason it took so long was the invisible zipper. The invisible zipper isn't completely unknown to me - I've managed it before - but its not my go-to preference. I'm much more comfortable with the centered zipper application so it takes me much, much less time. So with the invisible zipper, I spent more time putting it in, and even more time dithering and worrying about it beforehand. I had to rip one side of the zipper out because it got twisted before sewing, even though I thought I had carefully placed it. But I got that rascal in, and while it isn't perfect, I decided not to worry about perfection. What I need is practice, so I've decided to use invisible zippers hence forth, and so make myself practice.
One thing I really like about the pattern is the fact that you make your button holes right away while fashioning the bodice. I think this is an excellent idea - if you muck it up you can just cut a new new bodice and you haven't ruined your dress. I'll think I'll start doing that in the future, to the extent it is possible with other patterns.
Since I had made the Schoolhouse Tunic previously, I understood how the back facing and front bodice go together and it wasn't a problem. I like it, and it makes for a nice finish on the inside of the bodice:
In the end, I think the C cup was a bit big on me, and if I make it again, I'll try the B cup. The front gaps a little bit, so I pulled out a white collared blouse I made from an old bedsheet, which gave me more coverage and warmth for this time of year.
This pattern is well drafted, meaning, the sleeve caps weren't drafted with a ridiculous amount of ease like the big four patterns. Between the nice sleeve caps and the lycra, the sleeves went it easily. The only problem I had with the pattern was that the sleeve cuffs were somewhat tight on me. I don't think of myself as having heavy arms, so it is entirely possible that I got confused in tracing all those pattern lines and traced the wrong size. I might have even traced the cuffs for the three-quarter sleeves rather than the elbow length sleeves. Who knows? By the time I was done, I was too tired to find out, and I just let the sleeve cuffs out by a quarter of an inch and they fit fine now.
I ended up putting a one inch hem, rather than two inch the pattern called for since I want more coverage (I'm not in my 20s anymore!). I give a big thumbs up on this pattern, and I can envision making it in a baby cord fabric with the three-quarter sleeves for winter. You can see all the summery versions at Sew Liberated's website.
I think I'll make this one again, but this weekend I'm going a Sewing Retreat where I plan to make my dress for my company's Christmas party. I'm excited about spending the entire weekend with other sewers - sewing and eating constantly! I'm taking several patterns and several pieces of fabric, so I don't know what exactly I'll end up with. I never underestimate the power of Sloth in my creative process. : )
Subscribe to:
Posts (Atom)